
Expose Istio
In this section you will expose Istio and the services running behind it using the NGINX Ingress Controller. TLS termination will happen at the ALB in front of NGINX.
Fast Forward
If you have already exposed Istio, expand this box to fast-forward.
Go to your GitOps repository, inside your
rok-toolsmanagement environment:root@rok-tools:~# cd ~/ops/deploymentsSave your state:
root@rok-tools:~/ops/deployments# rok-j2 deploy/env.eks-alb-istio.j2 \ > -o deploy/env.eks-alb-istioCommit your changes:
root@rok-tools:~/ops/deployments# git commit -am "Expose Istio"Proceed to the Verify section.
Choose one of the following options to expose Istio:
Overview
What You’ll Need
- A configured management environment.
- Your clone of the Arrikto GitOps repository.
- An existing EKS cluster.
- A working AWS Load Balancer Controller deployment.
- A working NGINX Ingress Controller deployment.
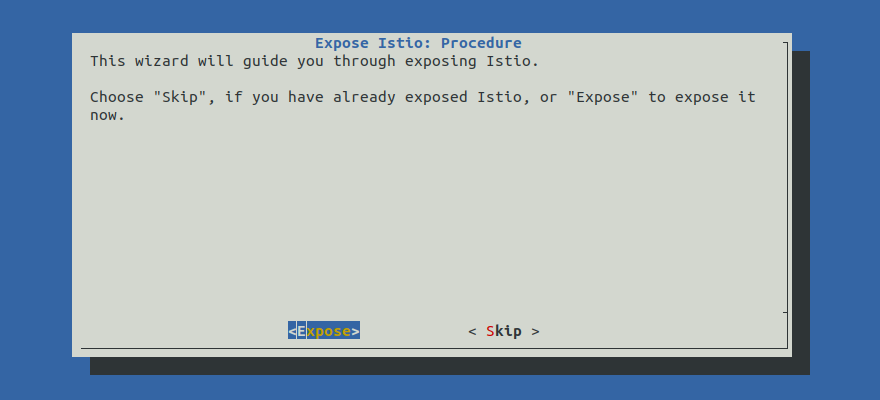
Option 1: Expose Istio Automatically (preferred)
Expose Istio by following the on-screen instructions on the rok-deploy
user interface.
If rok-deploy is not already running, start it with:
Proceed to the Summary section.
Option 2: Expose Istio Manually
If you want to expose Istio manually, follow the instructions below.
Procedure
Go to your GitOps repository, inside your
rok-toolsmanagement environment:root@rok-tools:/# cd ~/ops/deploymentsRestore the required context from previous sections:
root@rok-tools:~/ops/deployments# source <(cat deploy/env.eks-alb-acm)root@rok-tools:~/ops/deployments# export EKS_ALB_ACM_SUBDOMAINEdit
rok/expose-ekf/overlays/deploy/kustomization.yamland enable theingressresource:resources: - ../../base - ../../base/ingress.yamlNote
TLS termination takes place on the ALB with an ACM certificate, and thus you will create a plain HTTP ingress.
Edit
rok/expose-ekf/overlays/deploy/kustomization.yamland uncomment thexffpatch, including the toplevelpatchesdirective:patches: #- path: patches/ingress-host.yaml # target: # kind: Ingress # name: istio-ingress #- path: patches/ingress-tls.yaml #- path: patches/certificate.yaml - path: patches/xff.yaml target: kind: EnvoyFilter name: xff-trust-hopsSet the number of trusted proxies in front of the Gateway:
root@rok-tools:~/ops/deployments# export TRUSTED_FRONT_PROXIES=2Note
ALB acts as a L7 edge proxy so you have two proxies in front of Istio: ALB and NGINX.
Render the Istio envoy filter patch template with the variables you have specified:
root@rok-tools:~/ops/deployments# j2 \ > rok/expose-ekf/overlays/deploy/patches/xff.yaml.j2 \ > -o rok/expose-ekf/overlays/deploy/patches/xff.yamlEdit
rok/expose-ekf/overlays/deploy/kustomization.yamland enable theingress-hostpatch by uncommenting the corresponding snippet. The final result will look like this:patches: - path: patches/ingress-host.yaml target: kind: Ingress name: istio-ingress #- path: patches/ingress-tls.yaml #- path: patches/certificate.yaml - path: patches/xff.yaml target: kind: EnvoyFilter name: xff-trust-hopsNote
There may be cases where you have more that one
patchesdirectives in your kustomization, including (but not limited to) the case where you have followed the Patch All Images for Your Deployment document. In cases like this, you need to merge the twopatches:sections before you save the file, so you end up with only a singlepatches:section, a single list of patches. To do so:Delete the extra
patchesline so that only one remains.Cut and paste the rest of the lines under the remaining
patchesdirective. The final result will look like this:patches: - path: patches/ingress-host.yaml target: kind: Ingress name: istio-ingress # Generated by rok-image-patch - target: kind: ConfigMap name: istio-sidecar-injector path: patches/image-patch-istio-sidecar-injector.yamlEnsure that you have only one toplevel
patchesdirective:root@rok-tools:~/ops/deployments# grep ^patches: rok/expose-ekf/overlays/deploy/kustomization.yaml | wc -l 1
Render the Istio ingress patch template with the variables you have specified:
root@rok-tools:~/ops/deployments# j2 \ > rok/expose-ekf/overlays/deploy/patches/ingress-host.yaml.j2 \ > -o rok/expose-ekf/overlays/deploy/patches/ingress-host.yamlSave your state:
root@rok-tools:~/ops/deployments# rok-j2 deploy/env.eks-alb-istio.j2 \ > -o deploy/env.eks-alb-istioCommit your changes:
root@rok-tools:~/ops/deployments# git commit -am "Expose Istio"Apply the kustomization:
root@rok-tools:~/ops/deployments# rok-deploy --apply rok/expose-ekf/overlays/deployAir Gapped
In case of a private only EKS cluster, external-dns will not be able to update Route 53 entries automatically. So you have to manually create an alias record, i.e., an A record pointing to the internal ALB created by the AWS Load Balancer Controller.
Mark your progress:
root@rok-tools:~/ops/deployments# export DATE=$(date -u "+%Y-%m-%dT%H.%M.%SZ")root@rok-tools:~/ops/deployments# git tag \ > -a deploy/${DATE?}/develop/eks-alb-istio \ > -m "Expose Istio"
Verify
Go to your GitOps repository, inside your
rok-toolsmanagement environment:root@rok-tools:/# cd ~/ops/deploymentsRestore the required context from previous sections:
root@rok-tools:~/ops/deployments# source <(cat deploy/env.eks-alb-acm)root@rok-tools:~/ops/deployments# export EKS_ALB_ACM_SUBDOMAINVerify that you have successfully created the Ingress object for Istio. The HOSTS field should match your SUBDOMAIN. Wait until the ADDRESS field shows the hostname of your Load Balancer:
root@rok-tools:~/ops/deployments# kubectl -n istio-system get ingress NAME CLASS HOSTS ADDRESS PORTS AGE istio-ingress nginx arrikto-cluster.apps.example.com e53a524a-ingressnginx-ingr-8872-592794601.us-east-1.elb.amazonaws.com 80 1mObtain the FQDN of your Load Balancer:
root@rok-tools:~/ops/deployments# echo ${EKS_ALB_ACM_SUBDOMAIN?} arrikto-cluster.apps.example.comOpen your browser, and go to the Rok UI at
https://<YOUR_SUBDOMAIN>/rok/Replace
<YOUR_SUBDOMAIN>with your the value ofEKS_ALB_ACM_SUBDOMAIN. For example:https://arrikto-cluster.apps.example.com/rok/Air Gapped
Use dynamic port forwarding along with SOCKS5 protocol in your browser.