
Create EKS Managed Node Group
This section will guide you through creating a managed node group.
Fast Forward
If you already have a node group for your cluster, expand this box to fast-forward.
Go to your GitOps repository, inside your
rok-toolsmanagement environment:root@rok-tools:~# cd ~/ops/deployments
Restore the required context from previous sections:
root@rok-tools:~/ops/deployments# source <(cat deploy/env.eks-cluster)
root@rok-tools:~/ops/deployments# export EKS_CLUSTER
Specify the name of your node group:
root@rok-tools:~/ops/deployments# EKS_NODEGROUP=<NODEGROUP>
Replace
NODEGROUPwith the name of your node group, for example:root@rok-tools:~/ops/deployments# EKS_NODEGROUP=general-workers
Specify your node group's instance type:
root@rok-tools:~/ops/deployments# export EKS_NODEGROUP_INSTANCE_TYPE=$(aws eks describe-nodegroup \
>   --cluster-name ${EKS_CLUSTER?} \
>   --nodegroup-name ${EKS_NODEGROUP?} \
>   --query nodegroup.instanceTypes --output text)
Specify your node group's AMI version:
root@rok-tools:~/ops/deployments# export EKS_NODEGROUP_AMI_VERSION=$(aws eks describe-nodegroup \
>   --cluster-name ${EKS_CLUSTER?} \
>   --nodegroup-name ${EKS_NODEGROUP?} \
>   --query nodegroup.releaseVersion --output text)
Specify the subnets that your node group uses:
root@rok-tools:~/ops/deployments# export EKS_NODEGROUP_SUBNETS=$(aws eks describe-nodegroup \
> --cluster-name ${EKS_CLUSTER?} \
> --nodegroup-name ${EKS_NODEGROUP?} \
> --query nodegroup.subnets \
> | jq -r '.[]' \
> | xargs)
Specify your node group's root disk size:
root@rok-tools:~/ops/deployments# export EKS_NODEGROUP_DISK_SIZE=<SIZE>
Save your state:
root@rok-tools:~/ops/deployments# j2 deploy/env.eks-nodegroup.j2 \
>   -o deploy/env.eks-nodegroup
Commit your changes:
root@rok-tools:~/ops/deployments# git commit -am "Create EKS Node Group"
Proceed to the Verify section.
Choose one of the following options to create a managed node group:
- Option 1: Create EKS Managed Node Group Automatically (preferred).
- Option 2: Create EKS Managed Node Group Manually.
What You'll Need
- A configured management environment.
- An existing EKS cluster.
Check Your Environment
In order to create a node group you need permissions for the following actions:
- Create EKS node groups.
- Pass IAM roles to EKS resources.
- Describe EC2 resources.
Note
If you do not have the above permissions, contact your AWS administrator to grant sufficient permissions to your IAM user.
Option 1: Create EKS Managed Node Group Automatically (preferred)
Choose one of the following options based on the node group type you want to create.
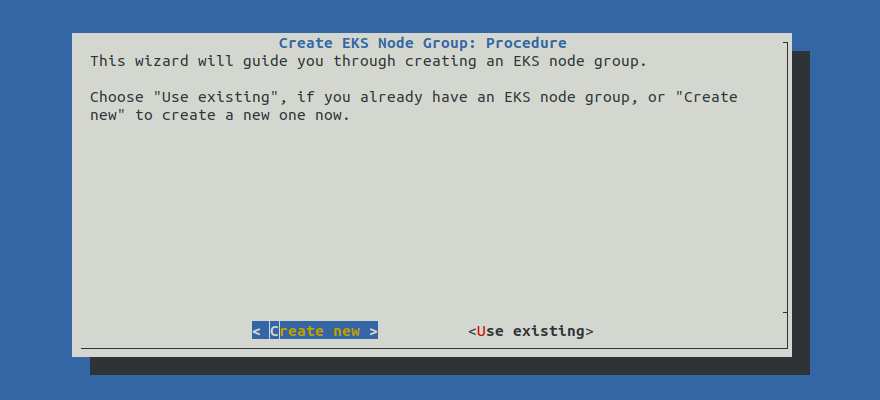
Create an EKS managed node group by following the on-screen instructions
on the rok-deploy user interface.
If rok-deploy is not already running, start it with:
root@rok-tools:~# rok-deploy --run-from eks-nodegroup
Proceed to the Summary section.
rok-deploy does not currently support the automatic creation of
GPU-enabled node groups. Please follow Option 2: Create EKS Managed
Node Group Manually to create a GPU-enabled node group manually.Option 2: Create EKS Managed Node Group Manually
If you want to create an EKS managed node group manually, follow this section.
Procedure
Go to your GitOps repository, inside your
rok-toolsmanagement environment:root@rok-tools:~# cd ~/ops/deployments/
Restore the required context from previous sections:
root@rok-tools:~/ops/deployments# source <(cat deploy/env.{envvars-aws,\
> eks-cluster,aws-subnets,eks-iam-node})
root@rok-tools:~/ops/deployments# export AWS_ACCOUNT_ID EKS_CLUSTER EKS_IAM_NODE_ROLE \
>   EKS_CLUSTER_VERSION AWS_SUBNETS_PUBLIC AWS_SUBNETS_PRIVATE
Choose an instance type of your preference:
We recommend that you use an instance type that has instance store volumes (local NVMe storage) attached, such as
m5d.4xlarge:root@rok-tools:~/ops/deployments# export EKS_NODEGROUP_INSTANCE_TYPE=m5d.4xlarge
Choose an instance type with NVIDIA GPUs. We recommend that you use an instance type that has instance store volumes (local NVMe storage) attached, such as
p4d.24xlarge:root@rok-tools:~/ops/deployments# export EKS_NODEGROUP_INSTANCE_TYPE=p4d.24xlarge
Specify the AMI version you want your node group to use:
root@rok-tools:~/ops/deployments# export EKS_NODEGROUP_AMI_VERSION=1.19.15-20220112
Specify the subnets that the EKS node group will use.
Use the first public subnet of your VPC:
root@rok-tools:~/ops/deployments# export EKS_NODEGROUP_SUBNETS=$(echo ${AWS_SUBNETS_PUBLIC?} | cut -d' ' -f1)
Use the first private subnet of your VPC:
root@rok-tools:~/ops/deployments# export EKS_NODEGROUP_SUBNETS=$(echo ${AWS_SUBNETS_PRIVATE?} | cut -d' ' -f1)
Note
Advanced Networking: We recommend you use one of the available subnets based on whether you want nodes that are publicly or privately accessible. However, if you have specific networking requirements, you can explicitly specify any subset of your public and private subnets with:
root@rok-tools:~/ops/deployments# export EKS_NODEGROUP_SUBNETS="<SUBNET1> <SUBNET2>"
Specify the root device disk size:
root@rok-tools:~/ops/deployments# export EKS_NODEGROUP_DISK_SIZE=200
root@rok-tools:~/ops/deployments# export EXTRA_ARGS="--disk-size ${EKS_NODEGROUP_DISK_SIZE?}"
Check if your instance type has NVMe disks attached, that is, if it supports instance storage:
root@rok-tools:~/ops/deployments# aws ec2 describe-instance-types \
>     --instance-types ${EKS_NODEGROUP_INSTANCE_TYPE?} \
>     --query InstanceTypes[].InstanceStorageSupported \
>     --output text
True
(Optional) Add extra EBS volumes to your worker nodes. Skip this step if your instance type has NVMe disks attached.
Set the launch template name:
root@rok-tools:~/ops/deployments# export LAUNCH_TEMPLATE_NAME=eks-nodegroup-ebs
Create the launch template:
root@rok-tools:~/ops/deployments# aws ec2 create-launch-template \
>    --launch-template-name ${LAUNCH_TEMPLATE_NAME?} \
>    --launch-template-data file://rok/eks/launch-template-data-ebs.json
Alternatively, download the
launch-template-data-ebsthe JSON manifest provided below and use it locally.launch-template-data-ebs.json
1 { 2 "BlockDeviceMappings": [ 3 { 4-20 4 "DeviceName": "/dev/xvda", 5 "Ebs": { 6 "DeleteOnTermination": true, 7 "VolumeSize": 200, 8 "VolumeType": "gp2" 9 } 10 }, 11 { 12 "DeviceName": "/dev/sdf", 13 "Ebs": { 14 "DeleteOnTermination": true, 15 "VolumeSize": 1000, 16 "VolumeType": "gp2" 17 } 18 } 19 ], 20 "MetadataOptions": { 21 "HttpPutResponseHopLimit": 2 22 } 23 } Specify the corresponding options to use when creating the nodegroup:
root@rok-tools:~/ops/deployments# export EXTRA_ARGS="--launch-template name=${LAUNCH_TEMPLATE_NAME?}"
(Optional) Specify the node group taint, if you want the node group to be used exclusively for GPU workload:
Skip to the next step.
root@rok-tools:~/ops/deployments# TAINTS="--taints key=nvidia.com/gpu,effect=NO_SCHEDULE"
root@rok-tools:~/ops/deployments# EXTRA_ARGS="$EXTRA_ARGS $TAINTS"
Warning
Do not specify this taint if you do not want your node group to be dedicated only to GPU workload.
By specifying the aforementioned taint, you will only permit pods tolerating the specified taint to run on the GPU node group. On Kubernetes 1.19, the ExtendedResourceToleration admission controller will add the appropriate toleration on pods that request the nvidia.com/gpu resource. In order to run pods that do not request this resource and thus do not tolerate the taint, you should add a second non-GPU node group.
Save your state:
root@rok-tools:~/ops/deployments# j2 deploy/env.eks-nodegroup.j2 \
>   -o deploy/env.eks-nodegroup
Commit your changes:
root@rok-tools:~/ops/deployments# git commit -am "Create EKS Managed Node Group"
Create the node group:
root@rok-tools:~/ops/deployments# aws eks create-nodegroup \
>    --cluster-name ${EKS_CLUSTER?} \
>    --nodegroup-name general-workers \
>    --scaling-config minSize=1,maxSize=3,desiredSize=2 \
>    --subnets ${EKS_NODEGROUP_SUBNETS?} \
>    --instance-types ${EKS_NODEGROUP_INSTANCE_TYPE?} \
>    --ami-type AL2_x86_64 \
>    --node-role arn:aws:iam::${AWS_ACCOUNT_ID?}:role/${EKS_IAM_NODE_ROLE?} \
>    --labels role=general-worker \
>    --release-version ${EKS_NODEGROUP_AMI_VERSION?} \
>    --kubernetes-version ${EKS_CLUSTER_VERSION?} \
>    ${EXTRA_ARGS?}
root@rok-tools:~/ops/deployments# aws eks create-nodegroup \
>    --cluster-name ${EKS_CLUSTER?} \
>    --nodegroup-name gpu-workers \
>    --scaling-config minSize=0,maxSize=10,desiredSize=3 \
>    --subnets ${EKS_NODEGROUP_SUBNETS?} \
>    --instance-types ${EKS_NODEGROUP_INSTANCE_TYPE?} \
>    --ami-type AL2_x86_64_GPU \
>    --node-role arn:aws:iam::${AWS_ACCOUNT_ID?}:role/${EKS_IAM_NODE_ROLE?} \
>    --labels role=gpu-worker \
>    --release-version ${EKS_NODEGROUP_AMI_VERSION?} \
>    --kubernetes-version ${EKS_CLUSTER_VERSION?} \
>    ${EXTRA_ARGS?}
Troubleshooting
AccessDenied
If the above command fails with an error message similar to the following:
An error occurred (AccessDeniedException) when calling the
CreateNodegroup operation: User:
arn:aws:iam::123456789012:user/user is not authorized to
perform: eks:CreateNodegroup on resource:
arn:aws:eks:us-east-1:123456789012:cluster/arrikto-cluster
it means that your IAM user does not have sufficient permissions to perform an action necessary to create a node group.
To proceed, Check Your Environment and contact your AWS administrator to grant sufficient permissions to your IAM user.
InvalidRequestException
If the above command fails with an error message similar to the following:
An error occurred (InvalidRequestException) when calling the
CreateNodegroup operation: You are not authorized to perform
ec2:DescribeSubnets.
it means that your IAM user does not have sufficient permissions to perform an action necessary to create a node group.
To proceed, Check Your Environment and contact your AWS administrator to grant sufficient permissions to your IAM user.
InvalidParameterException
If the above command fails with the following error message:
An error occurred (InvalidParameterException) when calling the
CreateNodegroup operation: Requested Nodegroup release version
X is invalid.
it means that Amazon has released a new AMI for EKS, most likely with an upgraded amazonlinux kernel.
Contact Arrikto
Coordinate with Arrikto's Tech Team to ensure that you have container images that support the latest AMI and kernel.
Wait for the node group to become ACTIVE:
root@rok-tools:~/ops/deployments# watch aws eks describe-nodegroup \
>    --cluster-name ${EKS_CLUSTER?} \
>    --nodegroup-name general-workers \
>    --query nodegroup.status \
>    --output text
ACTIVE
root@rok-tools:~/ops/deployments# watch aws eks describe-nodegroup \
>    --cluster-name ${EKS_CLUSTER?} \
>    --nodegroup-name gpu-workers \
>    --query nodegroup.status \
>    --output text
ACTIVE
Note
Press
CTRL+Cto exit when you see the ACTIVE message.Ensure that the nodes join the Kubernetes cluster:
root@rok-tools:~/ops/deployments# kubectl get nodes
NAME                                              STATUS   ROLES    AGE    VERSION
ip-192-168-14-158.eu-central-1.compute.internal   Ready    <none>   117s   v1.17.12-eks-7684af
ip-192-168-59-181.eu-central-1.compute.internal   Ready    <none>   117s   v1.17.12-eks-7684af
Verify
Go to your GitOps repository, inside your
rok-toolsmanagement environment:root@rok-tools:~# cd ~/ops/deployments
Restore the required context from previous sections:
root@rok-tools:~/ops/deployments# source <(cat deploy/env.{eks-cluster,\
> eks-nodegroup,aws-subnets})
root@rok-tools:~/ops/deployments# export EKS_CLUSTER EKS_NODEGROUP_SUBNETS \
>   AWS_SUBNETS_PUBLIC AWS_SUBNETS_PRIVATE
Ensure that all subnets that the EKS node group will use are among the public and private subnets:
root@rok-tools:~/ops/deployments# echo ${EKS_NODEGROUP_SUBNETS?}
subnet-018e3b5b3ec930ccb
root@rok-tools:~/ops/deployments# echo ${AWS_SUBNETS_PUBLIC?} ${AWS_SUBNETS_PRIVATE?}
subnet-0b936cdc4fae6862a subnet-0110cc3509ed64a7e subnet-018e3b5b3ec930ccb subnet-074cebd1b78c50066
Verify that EC2 instances have been created:
root@rok-tools:~/ops/deployments# aws ec2 describe-instances \
>    --filters Name=tag-key,Values=kubernetes.io/cluster/${EKS_CLUSTER?}
{
    "Reservations": [
        {
            "Groups": [],
            "Instances": [
                {
                    "AmiLaunchIndex": 0,
                    "ImageId": "ami-012b81faa674369fc",
                    "InstanceId": "i-0a1795ed2c92c16d5",
                    "InstanceType": "p4d.24xlarge",
                    "LaunchTime": "2021-07-27T08:39:41+00:00",
                    "Monitoring": {
                        "State": "disabled"
                    },
                    "Placement": {
                        "AvailabilityZone": "eu-central-1b",
                        "GroupName": "",
                        "Tenancy": "default"
                    },
...
Verify that Kubernetes nodes have appeared:
root@rok-tools:~/ops/deployments# kubectl get nodes
NAME                                         STATUS   ROLES    AGE    VERSION
ip-172-31-0-86.us-west-2.compute.internal    Ready    <none>   8m2s   v1.19.13-eks-8df270
ip-172-31-24-96.us-west-2.compute.internal   Ready    <none>   8m4s   v1.19.13-eks-8df270
Summary
You have successfully created a managed node group.