
Create EKS Managed Node Group
This section will guide you through creating a managed node group.
Fast Forward
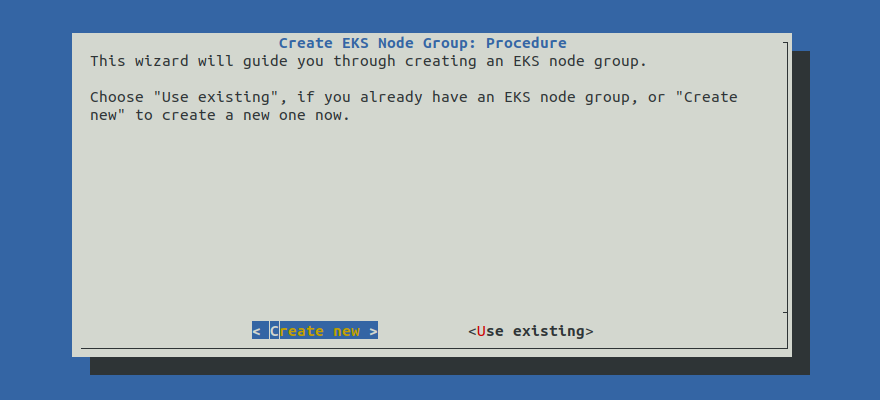
If you already have a node group for your cluster, expand this box to fast-forward.
Go to your GitOps repository, inside your
rok-toolsmanagement environment:root@rok-tools:~# cd ~/ops/deploymentsRestore the required context from previous sections:
root@rok-tools:~/ops/deployments# source <(cat deploy/env.eks-cluster)root@rok-tools:~/ops/deployments# export EKS_CLUSTERSpecify the name of your node group:
root@rok-tools:~/ops/deployments# export EKS_NODEGROUP=<NODEGROUP>Replace
NODEGROUPwith the name of your node group, for example:root@rok-tools:~/ops/deployments# export EKS_NODEGROUP=general-workersSpecify your node group’s instance type:
root@rok-tools:~/ops/deployments# export EKS_NODEGROUP_INSTANCE_TYPE=$(aws eks describe-nodegroup \ > --cluster-name ${EKS_CLUSTER?} \ > --nodegroup-name ${EKS_NODEGROUP?} \ > --query nodegroup.instanceTypes --output text)Specify your node group’s AMI version:
root@rok-tools:~/ops/deployments# export EKS_NODEGROUP_AMI_VERSION=$(aws eks describe-nodegroup \ > --cluster-name ${EKS_CLUSTER?} \ > --nodegroup-name ${EKS_NODEGROUP?} \ > --query nodegroup.releaseVersion --output text)Specify the subnets that your node group uses:
root@rok-tools:~/ops/deployments# export EKS_NODEGROUP_SUBNETS=$(aws eks describe-nodegroup \ > --cluster-name ${EKS_CLUSTER?} \ > --nodegroup-name ${EKS_NODEGROUP?} \ > --query nodegroup.subnets \ > | jq -r '.[]' \ > | xargs)Specify your node group’s root disk size:
root@rok-tools:~/ops/deployments# export EKS_NODEGROUP_DISK_SIZE=<SIZE>Save your state:
root@rok-tools:~/ops/deployments# j2 deploy/env.eks-nodegroup.j2 \ > -o deploy/env.eks-nodegroupCommit your changes:
root@rok-tools:~/ops/deployments# git commit -am "Create EKS Managed Node Group"Proceed to the Verify section.
Choose one of the following options to create a managed node group:
- Option 1: Create EKS Managed Node Group Automatically (preferred).
- Option 2: Create EKS Managed Node Group Manually.
What You’ll Need
- A configured management environment.
- An existing EKS cluster.
Check Your Environment
To create a managed node group, you are going to deploy a CloudFormation stack. When working with AWS CloudFormation stacks to manage resources, not only do you need sufficient permissions on AWS CloudFormation, but also on the underlying resources that are defined in the template.
In order to create a managed node group for your EKS cluster using AWS CloudFormation you need permissions for the following actions:
- Deploy AWS CloudFormation stacks.
- Create EKS node groups.
- Pass IAM roles to EKS resources.
- Describe EC2 resources.
- (Optional) Permissions to create launch templates if you are going to create a managed node group without NVMe disks attached to it.
Note
If you do not have the above permissions, contact your AWS administrator to grant sufficient permissions to your IAM user or deploy the below AWS CloudFormation stack for you.
Option 1: Create EKS Managed Node Group Automatically (preferred)
Choose one of the following options based on the node group type you want to create.
Create an EKS managed node group by following the on-screen instructions
on the rok-deploy user interface.
If rok-deploy is not already running, start it with:
Proceed to the Summary section.
rok-deploy does not currently support the automatic creation of
GPU-enabled node groups. Please follow Option 2: Create EKS Managed
Node Group Manually to create a GPU-enabled node group manually.Option 2: Create EKS Managed Node Group Manually
If you want to create an EKS managed node group manually, follow this section.
Procedure
Go to your GitOps repository, inside your
rok-toolsmanagement environment:root@rok-tools:~# cd ~/ops/deployments/Restore the required context from previous sections:
root@rok-tools:~/ops/deployments# source <(cat deploy/env.{envvars-aws,\ > eks-cluster,aws-subnets,eks-iam-node})root@rok-tools:~/ops/deployments# export AWS_ACCOUNT_ID AWS_DEFAULT_REGION EKS_CLUSTER \ > EKS_IAM_NODE_ROLE EKS_CLUSTER_VERSION AWS_SUBNETS_PUBLIC AWS_SUBNETS_PRIVATESpecify a name for your node group:
root@rok-tools:~/ops/deployments# export EKS_NODEGROUP=<NODEGROUP>Replace
NODEGROUPwith the name of your node group. For example, you can choose one of the following options, based on the type of node group you want to create:root@rok-tools:~/ops/deployments# export EKS_NODEGROUP=general-workersroot@rok-tools:~/ops/deployments# export EKS_NODEGROUP=gpu-workersChoose an instance type of your preference. Choose one of the following options, based on the type of the node group you want to create:
We recommend that you use an instance type that has instance store volumes (local NVMe storage) attached, such as
m5d.4xlarge:root@rok-tools:~/ops/deployments# export EKS_NODEGROUP_INSTANCE_TYPE=m5d.4xlargeChoose an instance type with NVIDIA GPUs. We recommend that you use an instance type that has instance store volumes (local NVMe storage) attached, such as
p4d.24xlarge:root@rok-tools:~/ops/deployments# export EKS_NODEGROUP_INSTANCE_TYPE=p4d.24xlargeSpecify the AMI version of the Amazon EKS optimized AMI you want to use. Choose one of the following options based on the Kubernetes version of your EKS cluster.
root@rok-tools:~/ops/deployments# export EKS_NODEGROUP_AMI_VERSION=1.21.5-20220429root@rok-tools:~/ops/deployments# export EKS_NODEGROUP_AMI_VERSION=1.20.11-20220429root@rok-tools:~/ops/deployments# export EKS_NODEGROUP_AMI_VERSION=1.19.15-20220429Specify the subnets that the EKS node group will use. Choose on of the following options, based on whether you want your node group to have public or private subnets:
Use the first public subnet of your VPC:
root@rok-tools:~/ops/deployments# export EKS_NODEGROUP_SUBNETS=$(echo ${AWS_SUBNETS_PUBLIC?} | cut -d' ' -f1)Use the first private subnet of your VPC:
root@rok-tools:~/ops/deployments# export EKS_NODEGROUP_SUBNETS=$(echo ${AWS_SUBNETS_PRIVATE?} | cut -d' ' -f1)Note
Advanced Networking: We recommend you use one of the available subnets based on whether you want nodes that are publicly or privately accessible. However, if you have specific networking requirements, you can explicitly specify any subset of your public and private subnets with:
root@rok-tools:~/ops/deployments# export EKS_NODEGROUP_SUBNETS="<SUBNET1> <SUBNET2>"Ensure all the subnets that the EKS node group will use belong to the same availability zone.
Specify the root device disk size:
root@rok-tools:~/ops/deployments# export EKS_NODEGROUP_DISK_SIZE=200Specify whether to add extra EBS volumes to your worker nodes. Extra EBS volumes are necessary only if your instance type does not have NVMe disks attached. Run the following command to determine whether to add extra EBS volumes, based on your instance type:
root@rok-tools:~/ops/deployments# export EKS_NODEGROUP_ADD_EXTRA_EBS_VOLUMES=$(aws ec2 \ > describe-instance-types \ > --instance-types ${EKS_NODEGROUP_INSTANCE_TYPE?} \ > --query "!(InstanceTypes[].InstanceStorageSupported | [0])" \ > --output text \ > | tr '[:upper:]' '[:lower:]')Optional
Specify if you want the node group to be used exclusively for GPU workload:
Skip to the next step.
root@rok-tools:~/ops/deployments# export EKS_NODEGROUP_GPU_WORKLOAD=trueWarning
Do not set this environment variable if you do not want your node group to be dedicated only to GPU workload.
By setting the aforementioned environment variable, you will add the
key=nvidia.com/gpu,effect=NO_SCHEDULEtaint to the node group. This will only permit pods tolerating the specified taint to run on the GPU node group. On Kubernetes 1.19, the ExtendedResourceToleration admission controller will add the appropriate toleration on pods that request the nvidia.com/gpu resource. In order to run pods that do not request this resource and thus do not tolerate the taint, you should add a second non-GPU node group.Set the name of the CloudFormation stack you will deploy:
root@rok-tools:~/ops/deployments# export EKS_NODEGROUP_CF_STACK=rok-${AWS_DEFAULT_REGION?}-${EKS_CLUSTER?}-managed-nodegroupImportant
If you already have a CF stack with the proposed name, for example you already have deployed a node group for your cluster, or you are in the process of upgrading your node groups, choose a different name.
Verify that the CloudFormation stack name you specified is not longer than 128 characters:
root@rok-tools:~/ops/deployments# [[ ${#EKS_NODEGROUP_CF_STACK} -le 128 ]] && echo OK || echo FAIL OKTroubleshooting
The output of the command is FAIL
Go back to step step 11 and specify a shorter name.
Ensure that the CloudFormation stack name you specified is not already in use:
root@rok-tools:~/ops/deployments# aws cloudformation describe-stacks \ > --stack-name ${EKS_NODEGROUP_CF_STACK?} &>/dev/null \ > && echo "Stack name already in use" \ > || echo "OK" OKTroubleshooting
The output of the command is “Stack name already in use”
Go back to step step 11 and specify a different name name.
Generate the AWS CloudFormation stack. Choose one of the following options, based on the type of node group you want to create:
root@rok-tools:~/ops/deployments# rok-j2 rok/eks/eks-managed-nodegroup.yaml.j2 \ > -o rok/eks/eks-managed-nodegroup.yamlAlternatively, save the
eks-managed-nodegroupCloudFormation template provided below and use it locally.eks-managed-nodegroup.yaml.j2
1 AWSTemplateFormatVersion: "2010-09-09" 2 3 Description: Amazon EKS - Managed Node Group 4-63 4 5 Metadata: 6 Rok::StackName: {{EKS_NODEGROUP_CF_STACK}} 7 8 Resources: 9 10 {%- set EKS_NODEGROUP_ADD_EXTRA_EBS_VOLUMES=EKS_NODEGROUP_ADD_EXTRA_EBS_VOLUMES|str2py("bool") %} 11 {%- set EKS_NODEGROUP_SUBNETS=EKS_NODEGROUP_SUBNETS|str2py("list") %} 12 13 NodeLaunchTemplate: 14 Type: AWS::EC2::LaunchTemplate 15 Properties: 16 LaunchTemplateData: 17 BlockDeviceMappings: 18 - DeviceName: /dev/xvda 19 Ebs: 20 DeleteOnTermination: true 21 VolumeSize: {{EKS_NODEGROUP_DISK_SIZE}} 22 VolumeType: gp2 23 {%- if EKS_NODEGROUP_ADD_EXTRA_EBS_VOLUMES %} 24 - DeviceName: /dev/sdf 25 Ebs: 26 DeleteOnTermination: true 27 VolumeSize: 1000 28 VolumeType: gp2 29 {%- endif %} 30 MetadataOptions: 31 HttpTokens: required 32 HttpPutResponseHopLimit: 1 33 34 EKSNodegroup: 35 Type: 'AWS::EKS::Nodegroup' 36 Properties: 37 AmiType: AL2_x86_64 38 ClusterName: {{EKS_CLUSTER}} 39 InstanceTypes: 40 - {{EKS_NODEGROUP_INSTANCE_TYPE}} 41 NodegroupName: {{EKS_NODEGROUP}} 42 NodeRole: 'arn:aws:iam::{{AWS_ACCOUNT_ID}}:role/{{EKS_IAM_NODE_ROLE}}' 43 ScalingConfig: 44 MinSize: 1 45 DesiredSize: 2 46 MaxSize: 3 47 Version: '{{EKS_CLUSTER_VERSION}}' 48 ReleaseVersion: {{EKS_NODEGROUP_AMI_VERSION}} 49 Labels: 50 role: {{EKS_NODEGROUP}} 51 Subnets: 52 {%- for subnet in EKS_NODEGROUP_SUBNETS %} 53 - {{subnet}} 54 {%- endfor %} 55 LaunchTemplate: 56 Id: !Ref NodeLaunchTemplate 57 58 Outputs: 59 60 Nodegroup: 61 Description: The Nodegroup 62 Value: !Ref EKSNodegroup 63 64 LaunchTemplate: 65 Description: The generated LaunchTemplate for the Nodegroup 66 Value: !Ref NodeLaunchTemplate root@rok-tools:~/ops/deployments# rok-j2 rok/eks/eks-managed-nodegroup-gpu.yaml.j2 \ > -o rok/eks/eks-managed-nodegroup-gpu.yamlAlternatively, save the
eks-managed-nodegroup-gpuCloudFormation template provided below and use it locally.eks-managed-nodegroup-gpu.yaml.j2
1 AWSTemplateFormatVersion: "2010-09-09" 2 3 Description: Amazon EKS - Managed Node Group 4-73 4 5 Metadata: 6 Rok::StackName: {{EKS_NODEGROUP_CF_STACK}} 7 8 Resources: 9 10 {%- set EKS_NODEGROUP_ADD_EXTRA_EBS_VOLUMES=EKS_NODEGROUP_ADD_EXTRA_EBS_VOLUMES|str2py("bool") %} 11 {%- if EKS_NODEGROUP_GPU_WORKLOAD is defined %} 12 {%- set EKS_NODEGROUP_GPU_WORKLOAD=EKS_NODEGROUP_GPU_WORKLOAD|str2py("bool") %} 13 {%- endif %} 14 {%- set EKS_NODEGROUP_SUBNETS=EKS_NODEGROUP_SUBNETS|str2py("list") %} 15 16 NodeLaunchTemplate: 17 Type: AWS::EC2::LaunchTemplate 18 Properties: 19 LaunchTemplateData: 20 BlockDeviceMappings: 21 - DeviceName: /dev/xvda 22 Ebs: 23 DeleteOnTermination: true 24 VolumeSize: {{EKS_NODEGROUP_DISK_SIZE}} 25 VolumeType: gp2 26 {%- if EKS_NODEGROUP_ADD_EXTRA_EBS_VOLUMES %} 27 - DeviceName: /dev/sdf 28 Ebs: 29 DeleteOnTermination: true 30 VolumeSize: 1000 31 VolumeType: gp2 32 {%- endif %} 33 MetadataOptions: 34 HttpTokens: required 35 HttpPutResponseHopLimit: 1 36 37 EKSNodegroup: 38 Type: 'AWS::EKS::Nodegroup' 39 Properties: 40 AmiType: AL2_x86_64_GPU 41 ClusterName: {{EKS_CLUSTER}} 42 InstanceTypes: 43 - {{EKS_NODEGROUP_INSTANCE_TYPE}} 44 NodegroupName: {{EKS_NODEGROUP}} 45 NodeRole: 'arn:aws:iam::{{AWS_ACCOUNT_ID}}:role/{{EKS_IAM_NODE_ROLE}}' 46 ScalingConfig: 47 MinSize: 0 48 DesiredSize: 3 49 MaxSize: 10 50 Version: '{{EKS_CLUSTER_VERSION}}' 51 ReleaseVersion: {{EKS_NODEGROUP_AMI_VERSION}} 52 Labels: 53 role: {{EKS_NODEGROUP}} 54 Subnets: 55 {%- for subnet in EKS_NODEGROUP_SUBNETS %} 56 - {{subnet}} 57 {%- endfor %} 58 LaunchTemplate: 59 Id: !Ref NodeLaunchTemplate 60 {%- if EKS_NODEGROUP_GPU_WORKLOAD is defined %} 61 {%- if EKS_NODEGROUP_GPU_WORKLOAD == true %} 62 Taints: 63 - Key: nvidia.com/gpu 64 Effect: NO_SCHEDULE 65 {%- endif %} 66 {%- endif %} 67 68 Outputs: 69 70 Nodegroup: 71 Description: The Nodegroup 72 Value: !Ref EKSNodegroup 73 74 LaunchTemplate: 75 Description: The generated LaunchTemplate for the Nodegroup 76 Value: !Ref NodeLaunchTemplate Save your state:
root@rok-tools:~/ops/deployments# j2 deploy/env.eks-nodegroup.j2 \ > -o deploy/env.eks-nodegroupCommit your changes:
root@rok-tools:~/ops/deployments# git commit -am "Create EKS Managed Node Group"Mark your progress:
root@rok-tools:~/ops/deployments# export DATE=$(date -u "+%Y-%m-%dT%H.%M.%SZ")root@rok-tools:~/ops/deployments# git tag -a deploy/${DATE?}/release-1.5/eks-nodegroup-managed \ > -m "Create EKS Managed Node Group"Deploy the CloudFormation stack. Choose one of the following options, based on the type of node group you want to create:
root@rok-tools:~/ops/deployments# aws cloudformation deploy \ > --stack-name ${EKS_NODEGROUP_CF_STACK?} \ > --template-file rok/eks/eks-managed-nodegroup.yaml Waiting for changeset to be created.. Waiting for stack create/update to complete Successfully created/updated stack - rok-us-west-2-arrikto-cluster-managed-nodegrouproot@rok-tools:~/ops/deployments# aws cloudformation deploy \ > --stack-name ${EKS_NODEGROUP_CF_STACK?} \ > --template-file rok/eks/eks-managed-nodegroup-gpu.yaml Waiting for changeset to be created.. Waiting for stack create/update to complete Successfully created/updated stack - rok-us-west-2-arrikto-cluster-managed-nodegroupTroubleshooting
AccessDenied
If the above command fails with an error message similar to the following:
An error occurred (AccessDenied) when calling the DescribeStacks operation: User: arn:aws:iam::123456789012:user/user is not authorized to perform: cloudformation:DescribeStacks on resource: arn:aws:cloudformation:us-west-2:123456789012:stack/rok-us-west-2-arrikto-cluster-managed-nodegroupit means that your IAM user does not have sufficient permissions to perform an action necessary to deploy an AWS CloudFormation stack.
To proceed, Check Your Environment and contact your AWS administrator to grant sufficient permissions to your IAM user or deploy the AWS CloudFormation stack for you.
Failed to create/update the stack
If the above command fails with an error message similar to the following:
Failed to create/update the stack. Run the following command to fetch the list of events leading up to the failure aws cloudformation describe-stack-events --stack-name rok-us-west-2-arrikto-cluster-managed-nodegroupdescribe the events of the CloudFormation stack to identify the root cause of the failure:
root@rok-tools:~/ops/deployments# aws cloudformation describe-stack-events --stack-name ${EKS_NODEGROUP_CF_STACK?}A stack event like the following:
{ "StackId": "arn:aws:cloudformation:us-west-2:123456789012:stack/rok-us-west-2-arrikto-cluster-managed-nodegroup/abdc3710-31cf-11ec-bcc2-0638bc4e4432", "EventId": "EKSNodegroup-CREATE_FAILED-2021-10-20T18:01:06.023Z", "StackName": "rok-us-west-2-arrikto-cluster-managed-nodegroup", "LogicalResourceId": "EKSNodegroup", "PhysicalResourceId": "", "ResourceType": "AWS::EKS::Nodegroup", "Timestamp": "2021-10-20T18:01:06.023000+00:00", "ResourceStatus": "CREATE_FAILED", "ResourceStatusReason": "arrikto-cluster|general-workers already exists in stack arn:aws:cloudformation:us-west-2:123456789012:stack/rok-us-west-2-arrikto-cluster-managed-nodegroup/15096010-31cf-11ec-a9ba-02ff3360d2ec", "ResourceProperties": "{\"NodegroupName\":\"general-workers\",\"NodeRole\":\"arn:aws:iam::123456789012:role/eksNodeRole\",\"Subnets\":[\"subnet-0df5835ed92a7a4e3\"],\"AmiType\":\"AL2_x86_64\",\"ScalingConfig\":{\"MinSize\":\"1\",\"DesiredSize\":\"2\",\"MaxSize\":\"3\"},\"Version\":\"1.21\",\"DiskSize\":\"200\",\"ClusterName\":\"arrikto-cluster\",\"Labels\":{\"role\":\"general-worker\"},\"InstanceTypes\":[\"m5d.4xlarge\"],\"ReleaseVersion\":\"1.21.5-20220429\"}" }means that the node group that the AWS CloudFormation stack defines already exists, leading to name conflicts. To proceed, go back to step 3, specify a different name for the node group and follow the rest of the guide.
Important
Rok will run in all the node groups of the cluster, including the existing one.
A stack event like the following:
{ "StackId": "arn:aws:cloudformation:us-west-2:123456789012:stack/rok-us-west-2-arrikto-cluster-managed-nodegroup/32095760-31d9-11ec-8997-0a68dd1c0600", "EventId": "EKSNodegroup-CREATE_FAILED-2021-10-20T19:09:16.574Z", "StackName": "rok-us-west-2-arrikto-cluster-managed-nodegroup", "LogicalResourceId": "EKSNodegroup", "PhysicalResourceId": "", "ResourceType": "AWS::EKS::Nodegroup", "Timestamp": "2021-10-20T19:09:16.574000+00:00", "ResourceStatus": "CREATE_FAILED", "ResourceStatusReason": "User: arn:aws:iam::123456789012:user/user/AWSCloudFormation is not authorized to perform: eks:TagResource on resource: arn:aws:eks:us-west-2:123456789012:cluster/arrikto-cluster (Service: AmazonEKS; Status Code: 403; Error Code: AccessDeniedException; Request ID: d68d784d-6a4c-48aa-b789-aa87e674849d; Proxy: null)", "ResourceProperties": "{\"NodegroupName\":\"general-workers\",\"NodeRole\":\"arn:aws:iam::123456789012:role/eksNodeRole\",\"Subnets\":[\"subnet-0df5835ed92a7a4e3\"],\"AmiType\":\"AL2_x86_64\",\"ScalingConfig\":{\"MinSize\":\"1\",\"DesiredSize\":\"2\",\"MaxSize\":\"3\"},\"Version\":\"1.21\",\"DiskSize\":\"200\",\"ClusterName\":\"arrikto-cluster\",\"Labels\":{\"role\":\"general-worker\"},\"InstanceTypes\":[\"m5d.4xlarge\"],\"ReleaseVersion\":\"1.21.5-20220429\"}" }means that your IAM user does not have sufficient permissions to perform an action necessary to create a node group via the AWS CloudFormation stack.
To proceed, Check Your Environment and contact your AWS administrator to grant your IAM user sufficient permissions or deploy the AWS CloudFormation stack for you.
A stack event like the following:
{ "StackId": "arn:aws:cloudformation:us-west-2:123456789012:stack/rok-us-west-2-arrikto-cluster-managed-nodegroup/53539590-5e64-11ec-8d5a-0a0f12e4f94e", "EventId": "NodeLaunchTemplate-CREATE_FAILED-2021-12-16T11:36:06.483Z", "StackName": "rok-us-west-2-arrikto-cluster-managed-nodegroup", "LogicalResourceId": "NodeLaunchTemplate", "PhysicalResourceId": "", "ResourceType": "AWS::EC2::LaunchTemplate", "Timestamp": "2021-12-16T11:36:06.483000+00:00", "ResourceStatus": "CREATE_FAILED", "ResourceStatusReason": "You are not authorized to perform this operation. Encoded authorization failure message: EGZ4pJLWnc8Fj297xGavQaF2Jo5aMk4ZQ-xHQegd69Z6AHB5orDoamNsCHQgIEKqKUZzscuctTrf_XXkONeFk1SoHc5xUTCpG_Czm6-oCCiQYLG_w6RyDPbR8Er31oGuyP19WCafeIWlsEQ4L6KfLpQn_oJSxAOjxbI7WBnG5UNa1VvEPl1M9wqYkqdGyPxac4rlxTDa1DHzCQ81fnIB9mC7VGGRswyY5V4h6Wm-Iz_IkxEazf8cFjEy2QAGf2twvG9D4TQpVrY9AYyjZfKW6aEeR0teBz_QBiqXj8VWWuBfl1c0dq9OZef9kpK2H4sLHxSYv9fT76NEdVt8t7Vh7saq6l8ReDi3VDXoBjygLrwFrI4hKeDLka4ssKWn1YWYY6X8WI9nI8hn8jOdlnKErm3o6fA250fGP6tuT5t9jqYU04cFgKRpQsOemWFS-NGgbm2aK6zzFlDCKT-HR3cllhdIp9fhQZGaO4OijLVLnphsDvyJGetN8IzJmLH2S2CpXCmQQPzCjBgOURO-eKkXPuwN_gLFs-58lr-5g0eF (Service: AmazonEC2; Status Code: 403; Error Code: UnauthorizedOperation; Request ID: 83c42355-86e2-45ba-82db-6ecd4c5a439f; Proxy: null)", "ResourceProperties": "{\"LaunchTemplateData\":{\"BlockDeviceMappings\":[{\"Ebs\":{\"VolumeType\":\"gp2\",\"VolumeSize\":\"200\",\"DeleteOnTermination\":\"true\"},\"DeviceName\":\"/dev/xvda\"},{\"Ebs\":{\"VolumeType\":\"gp2\",\"VolumeSize\":\"1000\",\"DeleteOnTermination\":\"true\"},\"DeviceName\":\"/dev/sdf\"}]}}" }means that your IAM user does not have sufficient permissions to create a launch template via the AWS CloudFormation stack.
To proceed, Check Your Environment and contact your AWS administrator to grant your IAM user sufficient permissions or deploy the AWS CloudFormation stack for you.
A stack event like the following:
{ "StackId": "arn:aws:cloudformation:us-west-2:123456789012:stack/rok-us-west-2-arrikto-cluster-managed-nodegroup/e7bbc180-31eb-11ec-8eae-069520e483b6", "EventId": "EKSNodegroup-CREATE_FAILED-2021-10-20T21:23:14.135Z", "StackName": "rok-us-west-2-arrikto-cluster-managed-nodegroup", "LogicalResourceId": "EKSNodegroup", "PhysicalResourceId": "", "ResourceType": "AWS::EKS::Nodegroup", "Timestamp": "2021-10-20T21:23:14.135000+00:00", "ResourceStatus": "CREATE_FAILED", "ResourceStatusReason": "Requested release version 1.16.15-20210310 is not valid for kubernetes version 1.21. (Service: AmazonEKS; Status Code: 400; Error Code: InvalidParameterException; Request ID: 943a6345-8a2d-4718-ac70-417027c2026a; Proxy: null)", "ResourceProperties": "{\"NodegroupName\":\"general-workers\",\"NodeRole\":\"arn:aws:iam::123456789012:role/eksNodeRole\",\"Subnets\":[\"subnet-0df5835ed92a7a4e3\"],\"AmiType\":\"AL2_x86_64\",\"ScalingConfig\":{\"MinSize\":\"1\",\"DesiredSize\":\"2\",\"MaxSize\":\"3\"},\"Version\":\"1.21\",\"DiskSize\":\"200\",\"ClusterName\":\"arrikto-cluster\",\"Labels\":{\"role\":\"general-worker\"},\"InstanceTypes\":[\"m5d.4xlarge\"],\"ReleaseVersion\":\"1.21.5-20220429\"}" }means that the selected AMI release version is invalid.
Contact Arrikto
Coordinate with Arrikto’s Tech Team to ensure that you are using the latest AMI and that you have container images that support the latest AMI and kernel.
ValidationError
If the above command fails with an error message similar to the following:
An error occurred (ValidationError) when calling the CreateChangeSet operation: Stack:arn:aws:cloudformation:us-west-2:123456789012:stack/rok-us-west-2-arrikto-cluster-managed-nodegroup/88226820-31e9-11ec-a043-0609da0ab820 is in ROLLBACK_COMPLETE state and can not be updated.delete the stack and deploy it again.
Verify
Go to your GitOps repository, inside your
rok-toolsmanagement environment:root@rok-tools:~# cd ~/ops/deploymentsRestore the required context from previous sections:
root@rok-tools:~/ops/deployments# source <(cat deploy/env.{eks-cluster,\ > eks-nodegroup,aws-subnets,aws-vpc})root@rok-tools:~/ops/deployments# export EKS_CLUSTER EKS_NODEGROUP_SUBNETS \ > AWS_SUBNETS_PUBLIC AWS_SUBNETS_PRIVATE AWS_VPC_IDEnsure all subnets that the EKS node group will use are among the public and private subnets:
root@rok-tools:~/ops/deployments# echo ${EKS_NODEGROUP_SUBNETS?} subnet-018e3b5b3ec930ccb root@rok-tools:~/ops/deployments# echo ${AWS_SUBNETS_PUBLIC?} ${AWS_SUBNETS_PRIVATE?} subnet-0b936cdc4fae6862a subnet-0110cc3509ed64a7e subnet-018e3b5b3ec930ccb subnet-074cebd1b78c50066Ensure all the subnets that the EKS node group will use belong to the same availability zone. List the given subnets and ensure that the second column refers to exactly one AZ across all subnets:
root@rok-tools:~/ops/deployments# aws ec2 describe-subnets \ > --subnet-ids ${EKS_NODEGROUP_SUBNETS?} \ > --filter Name=vpc-id,Values=${AWS_VPC_ID?} \ > --query 'Subnets[].[SubnetId,AvailabilityZone]' \ > --output table -------------------------------------------- | DescribeSubnets | +---------------------------+--------------+ | subnet-018e3b5b3ec930ccb | us-east-1a | +---------------------------+--------------+Verify that EC2 instances have been created:
root@rok-tools:~/ops/deployments# aws ec2 describe-instances \ > --filters Name=tag-key,Values=kubernetes.io/cluster/${EKS_CLUSTER?} { "Reservations": [ { "Groups": [], "Instances": [ { "AmiLaunchIndex": 0, "ImageId": "ami-012b81faa674369fc", "InstanceId": "i-0a1795ed2c92c16d5", "InstanceType": "p4d.24xlarge", "LaunchTime": "2021-07-27T08:39:41+00:00", "Monitoring": { "State": "disabled" }, "Placement": { "AvailabilityZone": "eu-central-1b", "GroupName": "", "Tenancy": "default" }, ...Verify that all EC2 instances use IMDSv2 only:
Retrieve the EC2 instance IDs of your cluster:
root@rok-tools:~/ops/deployments# aws ec2 describe-instances \ > --filters Name=tag:kubernetes.io/cluster/${EKS_CLUSTER?},Values=owned \ > --query "Reservations[*].Instances[*].InstanceId" --output text i-075363bbf64a60e04 i-06a5ee72c6eed1badRepeat the steps below for each one of the EC2 instance IDs in the list of the previous step.
Specify the ID of the EC2 instance to operate on:
root@rok-tools:~/ops/deployments# export INSTANCE_ID=<INSTANCE_ID>Replace
<INSTANCE_ID>with one of the IDs you found in the previous step, for example:root@rok-tools:~/ops/deployments# export INSTANCE_ID=i-075363bbf64a60e04Verify that the
HttpTokensmetadata option is set torequired:root@rok-tools:~/ops/deployments# aws ec2 get-launch-template-data \ > --instance-id ${INSTANCE_ID?} \ > --query 'LaunchTemplateData.MetadataOptions.HttpTokens == `required`' trueVerify that the
HttpPutResponseHopLimitmetadata option is set to1:root@rok-tools:~/ops/deployments# aws ec2 get-launch-template-data \ > --instance-id ${INSTANCE_ID?} \ > --query 'LaunchTemplateData.MetadataOptions.HttpPutResponseHopLimit == `1`' trueGo back to step i and repeat steps i-iv for the remaining instance IDs.
Verify that Kubernetes nodes have appeared:
root@rok-tools:~/ops/deployments# kubectl get nodes NAME STATUS ROLES AGE VERSION ip-172-31-0-86.us-west-2.compute.internal Ready <none> 8m2s v1.21.5-eks-bc4871b ip-172-31-24-96.us-west-2.compute.internal Ready <none> 8m4s v1.21.5-eks-bc4871b
Summary
You have successfully created a managed node group.
What’s Next
The next step to disable unsafe operations for your EKS cluster.