Serve PyTorch Models
This section will guide you through serving a PyTorch model, using the Kale
serve API.
Overview
What You’ll Need
- An Arrikto EKF or MiniKF deployment with the default Kale Docker image.
- An understanding of how the Kale serve API works.
Procedure
This guide comprises three sections: In the first section, you explore and
process the dataset. Then, in the second section, you build, train, and package
a PyTorch model using the Torch model archiver for TorchServe. Next, you serve
the model using the Kale serve API and, finally, in the third section,
you will invoke the model service to get predictions on a holdout test subset.
Explore Dataset
In this guide, you will work with the CIFAR10 dataset. The CIFAR10
dataset consists of 60000 32x32 RBG images. The dataset creators have
categorized the images in 10 different classes and the end goal is to
correctly predict the object that each image depicts.
Create a new notebook server using the Kale GPU Docker image. The image will have the following naming scheme:
gcr.io/arrikto/jupyter-kale-gpu-py38:<IMAGE_TAG>Note
The
<IMAGE_TAG>varies based on the MiniKF or Arrikto EKF release.Note
If you want to have access to a GPU device you must specifically request one or more from the Jupyter Web App UI. For this user guide, access to a GPU device is not required, but we recommend to add one so that you can get better results.
Create a new Jupyter notebook (that is, an IPYNB file):
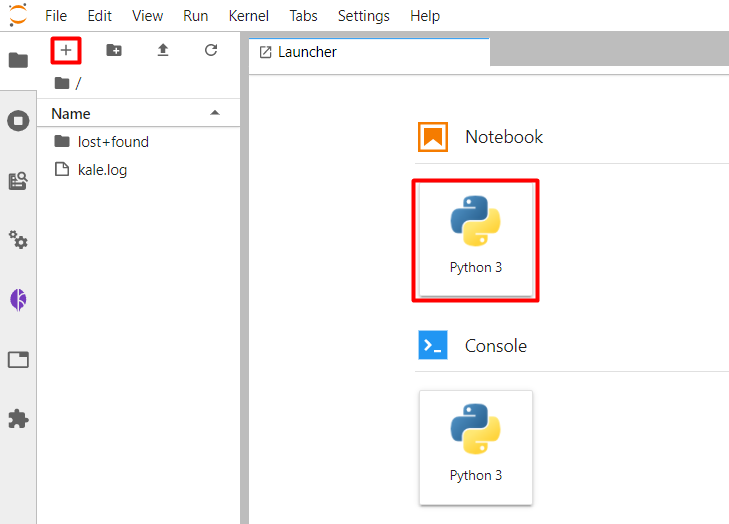
Install the necessary dependencies in the first code cell. Copy and paste the following code, and run the cell:
This is how your notebook cell will look like:

Restart the notebook’s kernel using the corresponding button in the UI:

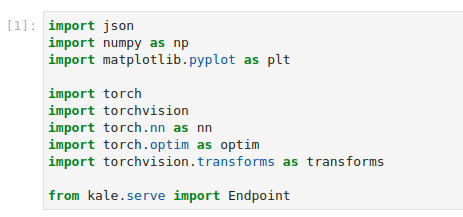
Copy and paste the import statements in the next code cell, and run it:
This is how your notebook cell will look like:
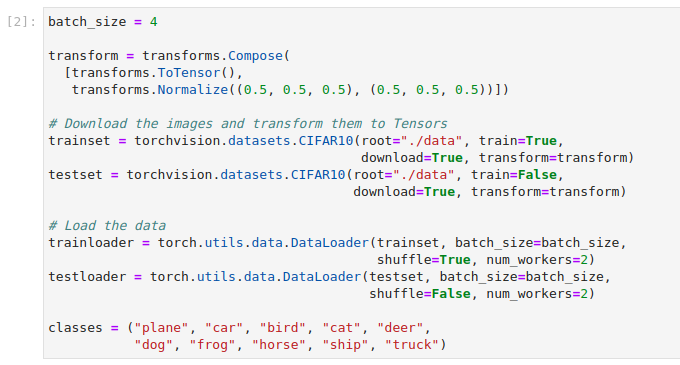
Load the dataset into train and test subsets. Copy and paste the following code into a new cell, and run it:
This is how your notebook cell will look like:
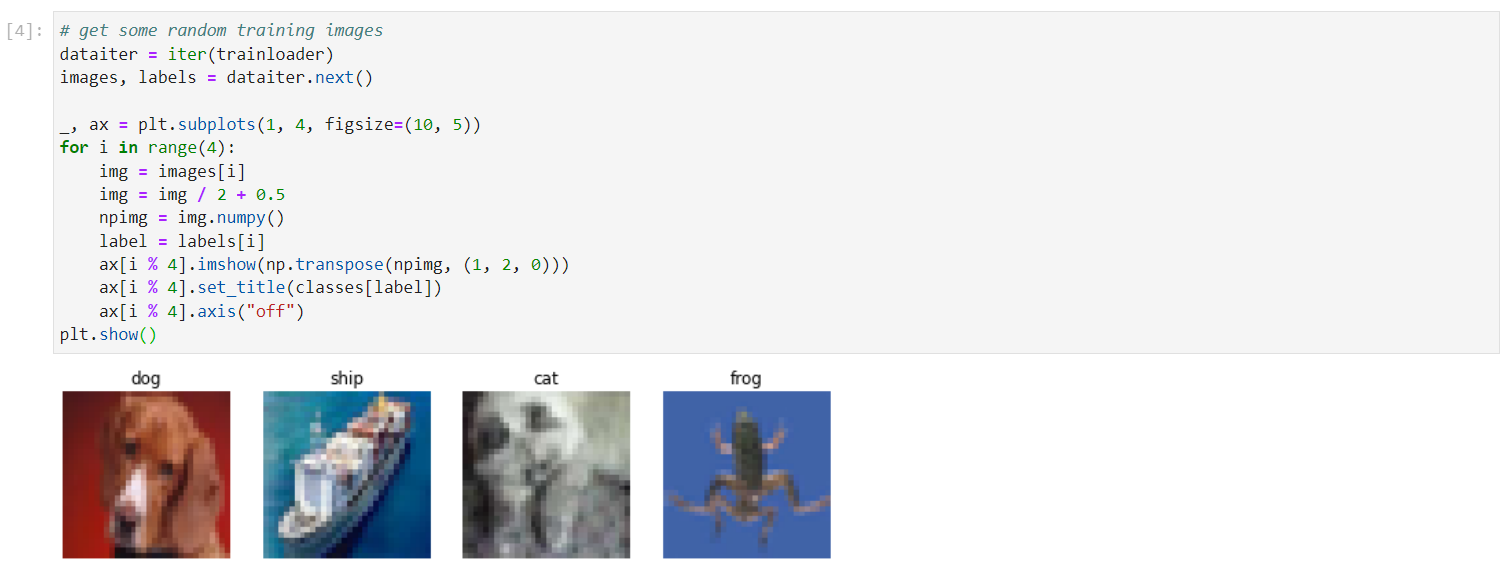
Visualize images from the dataset and print the category they belong to:
This is how your notebook cell will look like:
Serve PyTorch Model
In the same notebook server, open a terminal, and create two new Python files:
$ touch classifier.py $ touch cifar10_handler.py- Inside the first module you will define the PyTorch model.
- Inside the second module you will define a handler component. TorchServe needs this module to process the data before passing it to the model.
Note
To learn more about TorchServe handlers, see the TorchServe handlers documentation. TorchServe provides several default handlers for common use cases, but you can also define your own.
Define a simple PyTorch Convolutional Neural Network (CNN). Copy and paste the following code inside
classifier.py:classifier.py
1 # Copyright © 2022 Arrikto Inc. All Rights Reserved. 2 3 """PyTorch Model Definition. 4 5 This script defines a simple PyTorch CNN. 6 """ 7 8 import torch 9 import torch.nn as nn 10 import torch.nn.functional as f 11 12 13 class Net(nn.Module): 14 """Define CNN model.""" 15 16 def __init__(self): 17 super(Net, self).__init__() 18 self.conv1 = nn.Conv2d(3, 6, 5) 19 self.conv2 = nn.Conv2d(6, 16, 5) 20 self.fc1 = nn.Linear(16 * 5 * 5, 120) 21 self.fc2 = nn.Linear(120, 84) 22 self.fc3 = nn.Linear(84, 10) 23 24 def forward(self, x): 25 x = self.conv1(x) 26 x = f.relu(x) 27 x = f.max_pool2d(x, kernel_size=2) 28 x = self.conv2(x) 29 x = f.relu(x) 30 x = f.max_pool2d(x, kernel_size=2) 31 32 x = torch.flatten(x, 1) 33 x = self.fc1(x) 34 x = f.relu(x) 35 x = self.fc2(x) 36 x = f.relu(x) 37 x = self.fc3(x) 38 39 return x Copy and paste the following code inside
cifar10_handler.py:cifar10_handler.py
1 # Copyright © 2022 Arrikto Inc. All Rights Reserved. 2 3 """CIFAR10 handler Definition. 4 5 This script defines a simple TorchServe handler. 6 """ 7 8 from torchvision import transforms 9 from torch.profiler import ProfilerActivity 10 from ts.torch_handler.image_classifier import ImageClassifier 11 12 13 class Cifar10Classifier(ImageClassifier): 14 """Cifar10Classifier Handler.""" 15 16 class_names = ["plane", "car", "bird", "cat", "deer", 17 "dog", "frog", "horse", "ship", "truck"] 18 19 image_processing = transforms.Compose([ 20 transforms.ToTensor(), 21 transforms.Normalize((0.5, 0.5, 0.5), (0.5, 0.5, 0.5))]) 22 23 def __init__(self): 24 super(Cifar10Classifier, self).__init__() 25 self.profiler_args = { 26 "activities": [ProfilerActivity.CPU], 27 "record_shapes": True, 28 } 29 30 def postprocess(self, data): 31 """Convert the predicted output response to a label. 32 33 Args: 34 data (list): The predicted output response. 35 36 Returns: 37 list : A list of dictionaries with processed predictions. 38 """ 39 pred = data.argmax(1).tolist() 40 labels = [self.class_names[p] for p in pred] 41 return labels This script defines a custom image classifier handler, which processes the inputs before passing them to the model, and postprocesses the predictions before returning them to the client.
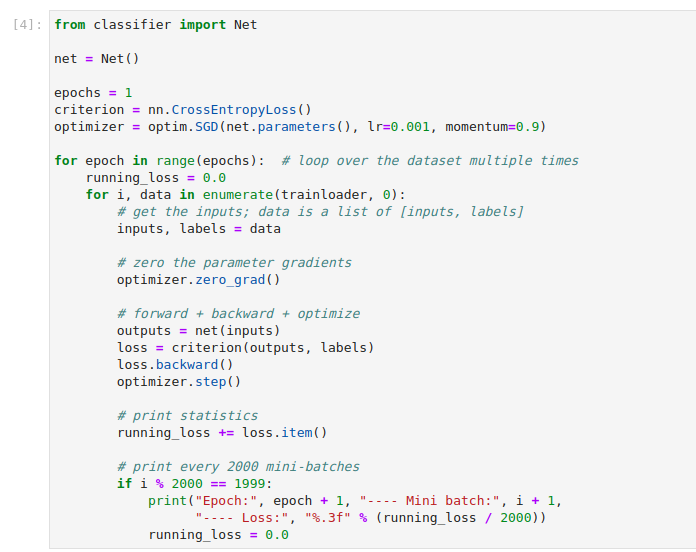
Return to your Notebook file and run the following code to train your model for one epoch:
This is how your notebook cell will look like:
Note
If you have a GPU device, you can train the model for more epochs. To do so, change the value of the
epochsvariable to a higher number. This will improve the accuracy of the model, but producing an accurate model is not the focus of this user guide.Serialize the model locally. Copy and paste the following code into a new cell, and run it:
This is how your notebook cell will look like:

This command will create a
model.ptdirectory, containing the weights of the model, and its definition. You will need these two files to package the model in a.marfile that can be deployed with KServe.In the terminal, run the
torch-model-archiverCLI to package the model and the handler:jovyan@serve-pytorch-0:~$ torch-model-archiver \ > --model-name cifar10 \ > --version 1.0 \ > --model-file /home/jovyan/model.pt/network.py \ > --serialized-file /home/jovyan/model.pt/model.pt \ > --handler /home/jovyan/cifar10_handlerThis command will create a
cifar10.marfile. You will need this file in the next step.Note
To learn more about
.mararchives, how you can create one, what are the different options, and how to use them, see the TorchServe documentation.Create and name a folder name
cifar10. This is the folder you will point TorchServe to. Inside there should be two other directories:- a
configdirectory containing aconfig.propertiesfile - a
model-storedirectory to hold the model archive
The following file tree depicts the final structure of the folder:
jovyan@serve-pytorch-0:~$ tree cifar10 cifar10 ├── config │ └── config.properties └── model-store └── cifar10.mar- a
Place the following contents in the
config.propertiesfile:config.properties
1 inference_address=http://0.0.0.0:8085 2 management_address=http://0.0.0.0:8085 3 metrics_address=http://0.0.0.0:8082 4 grpc_inference_port=7070 5 grpc_management_port=7071 6 enable_metrics_api=true 7 metrics_format=prometheus 8 number_of_netty_threads=4 9 job_queue_size=10 10 enable_envvars_config=true 11 install_py_dep_per_model=true 12 model_store=/mnt/models/model-store 13 model_snapshot={"name":"startup.cfg","modelCount":1,"models":{"cifar10":{"1.0":{"defaultVersion":true,"marName":"cifar10.mar","minWorkers":1,"maxWorkers":5,"batchSize":1,"maxBatchDelay":10,"responseTimeout":120}}}} Note
To learn more about the configuration options, head to the configuration guide for TorchServe.
Copy the
cifar10.marfile in themodel-storefolder:$ cp cifar10.mar cifar10/model-storeUpload the
cifar10folder to S3. You can complete this step manually or by using theawsCLI:$ aws s3 cp cifar10 s3://<bucket-name>/cifar10 --recursiveNote
You can use almost any object storage provider, such as AWS S3, Azure Blob Storage, or Google Cloud Storage. For a list of the KServe supported services and their configuration, see the KServe documentation.
Retrieve the S3 URI pointing to your
cifar10folder from the S3 UI. For examples3://<bucket-name>/.Important
You should provide a URI pointing but not including the
cifar10folder. In this case, if your URI iss3://<bucket-name>/cifar10, you should provides3://<bucket-name>/.In your terminal, create a new file named
s3-creds.yaml:$ touch s3-creds.yamlCopy and paste the following code into the
s3-creds.yamlfile:apiVersion: v1 kind: Secret metadata: name: s3-creds annotations: serving.kserve.io/s3-endpoint: s3.amazonaws.com serving.kserve.io/s3-region: <REGION> serving.kserve.io/s3-useanoncredential: "false" serving.kserve.io/s3-usehttps: "1" type: Opaque data: AWS_ACCESS_KEY_ID: <AWS-ACCESS-KEY-ID> AWS_SECRET_ACCESS_KEY: <AWS-SECRET-ACCESS-KEY>Replace the
<REGION>,<AWS-ACCESS-KEY-ID, and<AWS-SECRET-ACCESS-KEY>placeholders with your credentials. KServe reads the secret annotations to inject the S3 environment variables on the storage initializer or model agent to download the models from S3 storage.Create a new file for your
ServiceAccountresource:$ touch kserve-sa.yamlCopy and paste the following code into the
kserve-sa.yamlfile:apiVersion: v1 kind: ServiceAccount metadata: name: kserve-sa secrets: - name: s3-credsApply the
Secretand theServiceAccountresources:$ kubectl apply -f s3-creds.yaml && kubectl apply -f kserve-sa.yamlNote
If you are using a different object storage provider read the KServe documentation to configure your environment:
In the Notebook server you have running, instruct Kale to serve the model using the S3 URI you retrieved in a previous step:
from kale.serve import serve config = {"predictor": {"service_account_name": "kserve-sa", "storage_uri": "s3://kserve-examples/", "model_format": {"name": "pytorch"}}} isvc = serve(name="cifar-10", serve_config=config)This is how your notebook cell will look like:

Get Predictions
In this section, you will query the model endpoint to get predictions for the images in the test subset.
Navigate to the Models UI to retrieve the name of the
InferenceService. In this example, it iscifar10.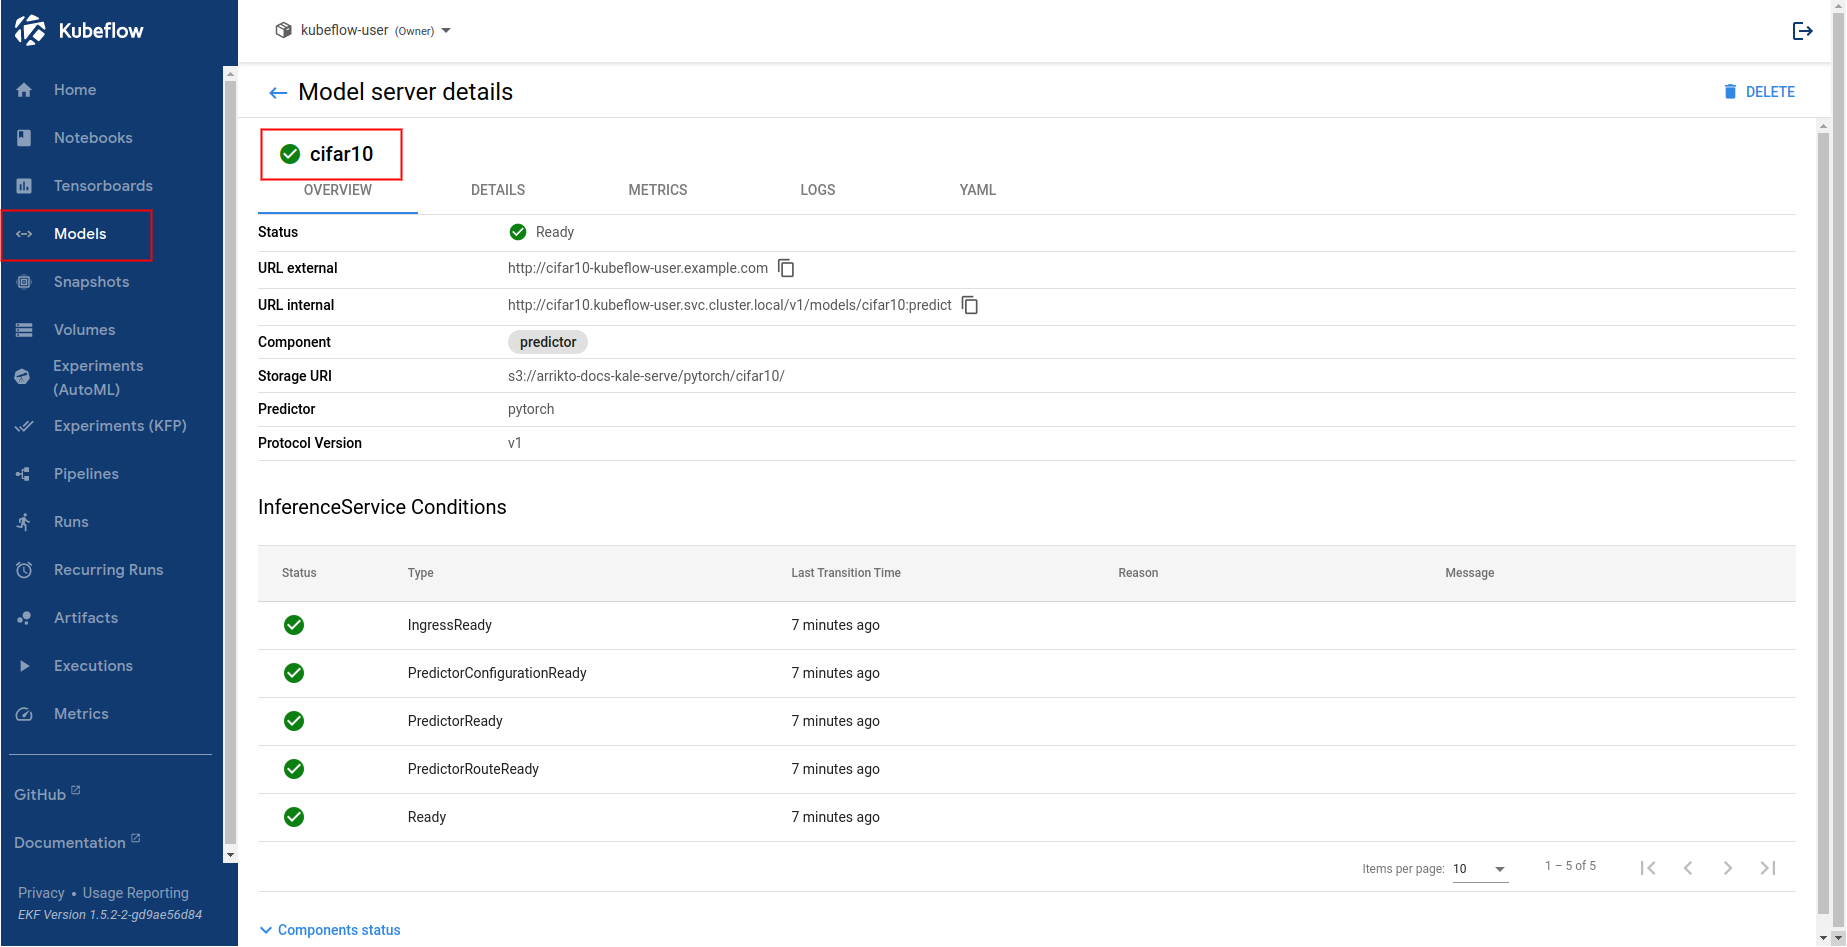
In the existing notebook, in a different code cell, initialize a Kale
Endpointobject using the name of theInferenceServiceyou retrieved in the previous step. Then, run the cell:Note
When initializing an
Endpoint, you can also pass the namespace of theInferenceService. For example, if your namespace ismy-namespace:If you do not provide one, Kale assumes the namespace of the notebook server. In our case it is
kubeflow-user.This is how your notebook cell will look like:

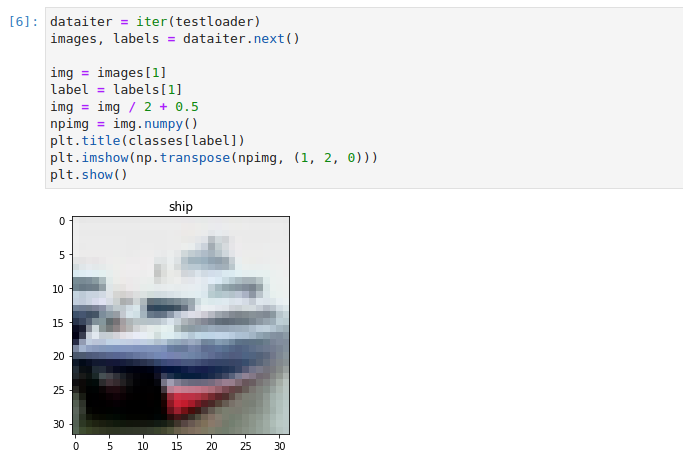
Visualize a test sample:
This is how your notebook cell will look like:
Transform the example image the same way you did during training:
This is how your notebook cell will look like:

Convert the test example into JSON format. Copy and paste the following code into a new code cell, and run it:
This is how your notebook cell will look like:

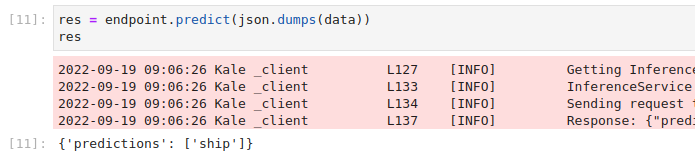
Invoke the server to get predictions. Copy and paste the following snippet in a different code cell, and run it:
This is how your notebook cell will look like: