
PyTorch Distributed with Kale
This section will guide you through creating and managing a PyTorchJob CR on
Kubeflow, with Kale and the PyTorch operator. For this guide we leverage
the interactive environment of JupyterLab, but this is completely optional and
we do it to demonstrate how you can monitor such a job using Kale's
PyTorchJob client.
Overview
What You'll Need
- An Arrikto EKF or MiniKF deployment with the default Kale Docker image.
Procedure
Create a new Notebook server using the default Kale Docker image. The image will have the following naming scheme:
gcr.io/arrikto/jupyter-kale-py36:<IMAGE_TAG>
Note
The
<IMAGE_TAG>varies based on the MiniKF or EKF release.Connect to the server, open a terminal, and install the
torchandtorchvisionpackages:$ pip3 install --user torch==1.9.0+cu111 torchvision==0.10.0+cu111 -f https://download.pytorch.org/whl/torch_stable.html
Note
The PyTorch version may be different. Please head to the PyTorch website for the latest releases.
Note
In this example, you will distribute the training job over multiple GPU devices. Thus, this command installs the CUDA version of the PyTorch package. If you are using CPU-only nodes, you can install the CPU-only version of the PyTorch package instead, and distribute the job over multiple CPU cores. You will see how to achieve that later in the user guide.
Create a new Jupyter Notebook (that is, an IPYNB file) using the JupyterLab UI and name it
kale_dist.ipynb: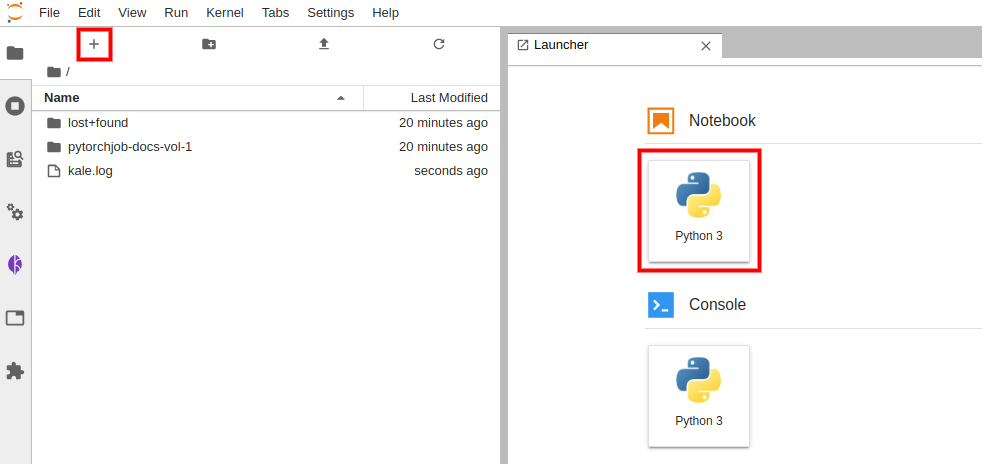
Copy and paste the import statements on the top code cell. Then run it:
This is how your notebook cell will look like:

Download the Fashion MNIST dataset. Copy and paste the following code snippet to a new code cell. Then run it:
This is how your notebook cell will look like:
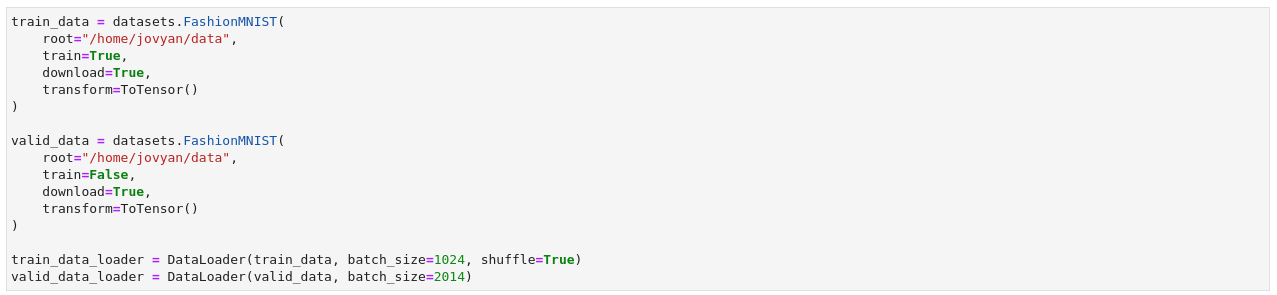
This cell will download the Fashion MNIST training and validation splits and transform them into PyTorch datasets. Then, you can build PyTorch
DataLoaderobjects to iterate over the data.Important
Always use absolute paths when specifying the path to a file or folder. For example, during the creation of the
train_datadataset, we specify where PyTorch should download the FashionMNIST dataset.Important
Working inside a JupyterLab environment is only supported for built-in PyTorch
Datasets. This includestorchvision,torchaudio, andtorchtextdatasets. This issue is due to how serialization works. Pickle andtorch.savecannot follow the dependency graph of an object to create a hermetic package, thus external dependencies, like a customDatasetdefinition, usually break the process. If you need to define a customDataset, by subclassing thetorch.utils.data.Datasetclass, you will need to work with the Kale SDK. For this, head to the Kale SDK example.Define a Convolutional Neural Network architecture, the optimizer, and the criterion (i.e., loss function). Copy and paste the following code snippet to a new code cell. Then run it:
This is how your notebook cell will look like:

This cell downloads a pretrained PyTorch model. This model is called ResNet, a common model architecture for computer vision challenges. You will fine-tune this model architecture on the FashionMNIST dataset in a distributed manner. Finally, we instantiate the optimizer and the criterion (that is, the loss function).
Define the step of the training procedure. Copy and paste the following code snippet to a new code cell. Then run it:
This is how your notebook cell will look like:
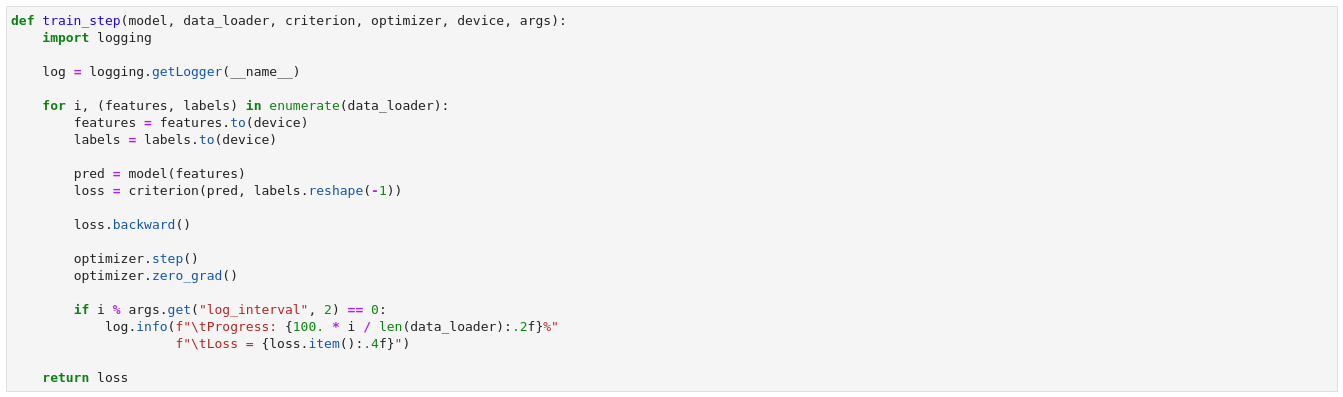
You can customize what happens during training using this function. You can pass any additional arguments using the
argsPython dictionary. In this example, you use thelog_intervalargument to control how often you log the training progress.Important
The
train_stepfunction must have exactly this signature and it must be a standalone function. This means that you should import all the Python modules the function depends on within its body and you must pass any extra arguments inside theargsdictionary.(Optional) Define the evaluation step of the training procedure. Copy and paste the following code snippet to a new code cell. Then run it:
This is how your notebook cell will look like:
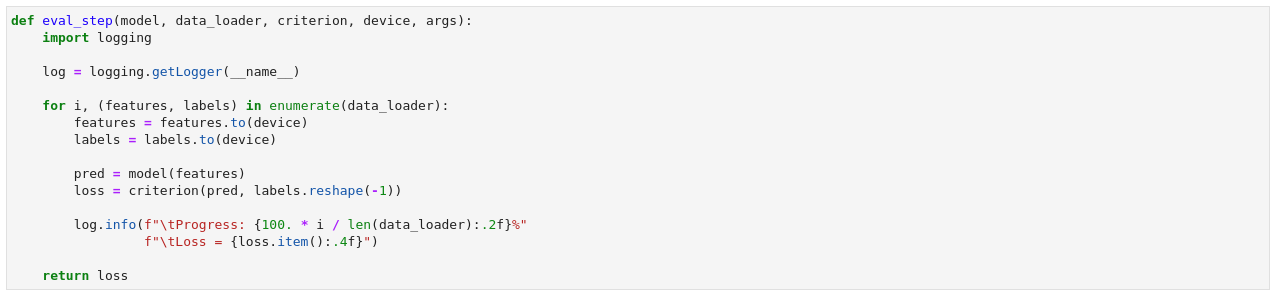
With this function you can log the performance of your model on a validation dataset. Kale will call this function at the end of each epoch. This is an optional step, however, it is highly recommended to evaluate your model on a validation dataset that is separate from the one that was used to train the model.
Important
The
eval_stepfunction must have exactly this signature and it must be a standalone function. This means that you should import all the Python modules the function depends on within its body and you must pass any extra arguments inside theargsdictionary.Create and submit a
PytorchJobCR. Copy and paste the following code snippet to a new code cell. Then run it:This is how your notebook cell will look like:

At a high level, the
distributefunction follows this process:- Save several assets to a local folder, including the training and
evaluation functions, the dataset, the
DataLoader, etc.. - Snapshot the volumes mounted to the Notebook Server.
- Hydrate new PVCs starting from the snapshots of the previous step.
- Create and submit a
PytorchJobCR. The master and the workers all mount the newly created PVCs as RWX.
Upon submission of the CR, the PyTorch operator creates the two processes you requested with the
number_of_processesargument (one is always the master, so#processes - 1 = #workers). By default, each process requests to consume a GPU device. These Pods run a Kale entrypoint which- Looks for the assets saved during the preparation phase in the local FS (backed by one of the RWX PVCs), and loads them into memory.
- Prepares the PyTorch objects for distributed training.
- Initializes the process group so that the master and the workers can synchronize.
- Starts the training and evaluation loop, calling
train_stepandeval_step.
Note
If you want to distribute your model across multiple CPU cores, you can set the
cudaargument toFalse. By default, Kale will launch two processes (the minimum number of processes required by thePyTorchJobCR), on two different GPU devices.- Save several assets to a local folder, including the training and
evaluation functions, the dataset, the
Monitor the
PytorchJobCR. Copy and paste the following code snippet to a new code cell. Then run it:This is how your notebook cell will look like:

Note
In this step you monitor the state of the Job. The state can be in one of the following states:
Created,Running,Failed, orSucceded. This call blocks until the training process is finished. To continue with the next step and view the logs, you can stop the interpreter by pressing the stop button in the Notebook UI. Otherwise, you can call theget_job_statusfunction of the client with no arguments. The function will return immediately, reporting back the current status of the Job.Stream the logs of the master process. Copy and paste the following code snippet to a new code cell. Then run it:
This is how your notebook cell will look like:
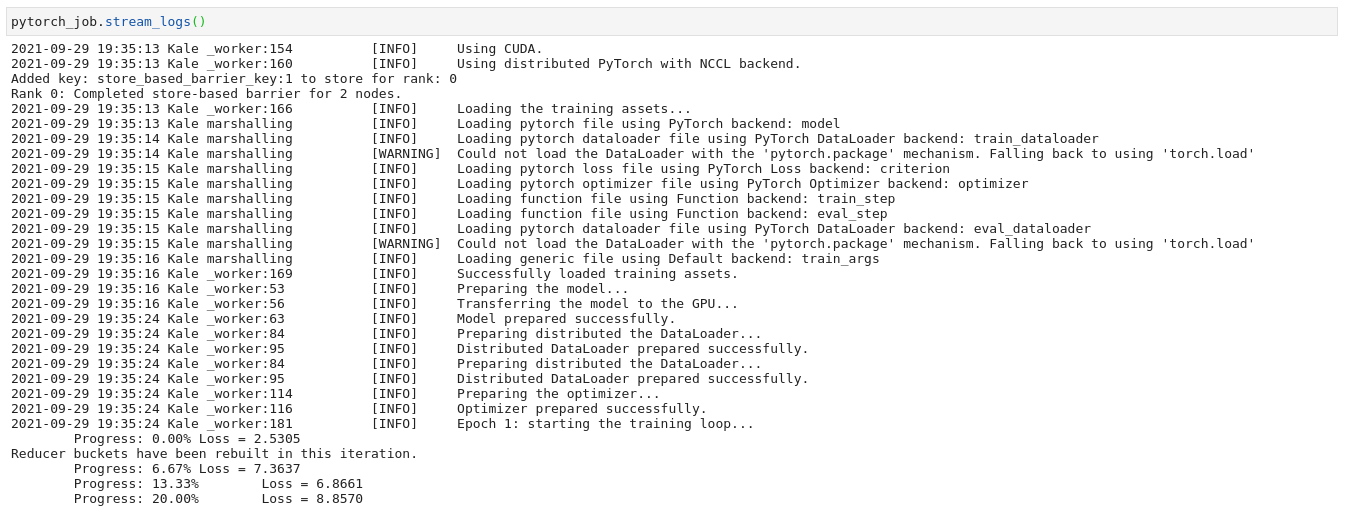
Note
In this step you view the logs of the pod running the master process. You can view the logs of the worker as well, however, in most cases, they are identical. This call blocks until the training process is finished. If you want to continue executing other Notebook cells, you can stop the interpreter by pressing the stop button in the Notebook UI.
When the training process is completed, you can delete the
PytorchJobCR. Copy and paste the following code snippet to a new code cell. Then run it:This is how your notebook cell will look like:

Important
After the completion of the training process the controller will not remove the resources it creates. If you do not want to leave stale resources you have to manually delete the CR. However, please note that deleting the CR will delete the PVC(s) attached to the pods running the processes as well. So, you will not have access to the resulting saved model. In future versions of Kale we plan to make this configurable and also log the resulting trained model to MLMD.
Summary
You have successfully run a PyTorch distributed process using Kale and the Kubeflow PyTorch operator.
What's Next
The next step is to create a PyTorch distributed KFP step using the Kale SDK.