
Create EKS Cluster
This section will guide you through creating an EKS cluster running one of the supported Kubernetes versions on EKS, that is, 1.21, 1.22, and 1.23.
Fast Forward
If you already have an EKS cluster, expand this box to fast-forward.
Specify the name of your EKS cluster. Replace
<EKS_CLUSTER>with your EKS cluster name:root@rok-tools:~# export EKS_CLUSTER=<EKS_CLUSTER>Set the cluster Kubernetes version:
root@rok-tools:~# export EKS_CLUSTER_VERSION=$(aws eks describe-cluster \ > --name ${EKS_CLUSTER?} --query cluster.version --output text)Specify the subnets that the EKS control plane uses:
root@rok-tools:~# export EKS_CLUSTER_SUBNETS=$(aws eks describe-cluster \ > --name ${EKS_CLUSTER?} \ > --query cluster.resourcesVpcConfig.subnetIds \ > | jq -r '.[]' \ > | xargs)Set the trusted CIDRs:
root@rok-tools:~# export EKS_TRUSTED_CIDRS=$(aws eks describe-cluster \ > --name ${EKS_CLUSTER?} \ > --query cluster.resourcesVpcConfig.publicAccessCidrs \ > --output text \ > | xargs)Define if your cluster has public access points:
root@rok-tools:~# export EKS_CLUSTER_PUBLIC=$(aws eks describe-cluster \ > --name ${EKS_CLUSTER?} --query cluster.resourcesVpcConfig.endpointPublicAccess)Go to your GitOps repository, inside your
rok-toolsmanagement environment:root@rok-tools:~# cd ~/ops/deploymentsSave your state:
root@rok-tools:~/ops/deployments# rok-j2 deploy/env.eks-cluster.j2 \ > -o deploy/env.eks-clusterCommit your changes:
root@rok-tools:~/ops/deployments# git commit -am "Create EKS Cluster"Proceed to the Verify section.
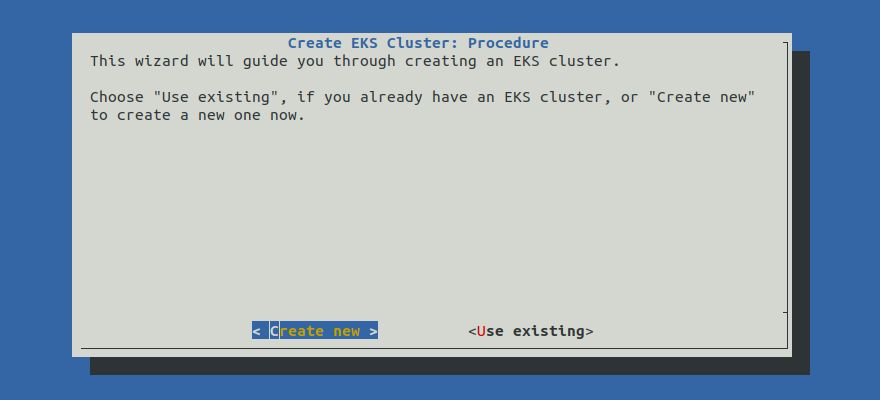
Choose one of the following options to create your EKS cluster:
Overview
What You’ll Need
- A configured management environment.
- A configured VPC.
Check Your Environment
In order to create an EKS cluster on AWS you need permissions for the following actions:
- Create EKS clusters.
- Pass IAM roles to EKS resources.
Note
If you do not have the above permissions, contact your AWS administrator to grant sufficient permissions to your IAM user.
Option 1: Create EKS Cluster Automatically (preferred)
Create an EKS cluster by following the on-screen instructions on the
rok-deploy user interface.
If rok-deploy is not already running, start it with:
Proceed to the Summary section.
Option 2: Create EKS Cluster Manually
If you want to create an EKS cluster manually, follow the instructions below.
Procedure
Go to your GitOps repository, inside your
rok-toolsmanagement environment:root@rok-tools:~# cd ~/ops/deploymentsRestore the required context from previous sections:
root@rok-tools:~/ops/deployments# source <(cat deploy/env.{envvars-aws,aws-subnets,\ > eks-iam-cluster})root@rok-tools:~/ops/deployments# export AWS_ACCOUNT_ID AWS_SUBNETS_PUBLIC \ > AWS_SUBNETS_PRIVATE EKS_IAM_CLUSTER_ROLESpecify the cluster name:
root@rok-tools:~/ops/deployments# export EKS_CLUSTER=<EKS_CLUSTER>Replace
<EKS_CLUSTER>with the desired name for your EKS cluster. For example:root@rok-tools:~/ops/deployments# export EKS_CLUSTER=arrikto-clusterSpecify the Kubernetes cluster version. Choose one of the following options, among the supported Kubernetes versions:
root@rok-tools:~# export EKS_CLUSTER_VERSION=1.23root@rok-tools:~# export EKS_CLUSTER_VERSION=1.22root@rok-tools:~# export EKS_CLUSTER_VERSION=1.21Specify the subnets that the EKS control plane will use. These should reside within at least two availability zones. Use all the available subnets:
root@rok-tools:~/ops/deployments# export EKS_CLUSTER_SUBNETS="${AWS_SUBNETS_PUBLIC?} ${AWS_SUBNETS_PRIVATE?}" root@rok-tools:~/ops/deployments# export EKS_CLUSTER_SUBNETS=${EKS_CLUSTER_SUBNETS# } root@rok-tools:~/ops/deployments# export EKS_CLUSTER_SUBNETS=${EKS_CLUSTER_SUBNETS% }Note
Advanced Networking: We recommend you use all the available subnets. However, if you have specific networking requirements, you can explicitly specify a subset of them with:
root@rok-tools:~/ops/deployments# export EKS_CLUSTER_SUBNETS="<SUBNET1> <SUBNET2>"Specify the trusted CIDRs:
root@rok-tools:~/ops/deployments# export EKS_TRUSTED_CIDRS=<CIDRS>Replace
<CIDRS>with your trusted CIDRs. For example, if you want to allow access for everyone, set:root@rok-tools:~/ops/deployments# export EKS_TRUSTED_CIDRS=0.0.0.0/0Note
If you wish to specify multiple CIDRs, create a space-separated list. For example:
root@rok-tools:~/ops/deployments# export EKS_TRUSTED_CIDRS="<CIDR1> <CIDR2>"Note
If you have specified only private subnets in the list of subnets that the EKS control plane will use, then use the default value of
0.0.0.0/0, since the subnets are not reachable outside your VPC.Note
If your management environment is an EC2 instance and has a different VPC from your EKS cluster, make sure the IP address of your EC2 instance belongs to the
TRUSTED_CIDRSaddress pool.Air Gapped
Use the default value of
0.0.0.0/0.Specify whether your cluster API endpoint will be publicly accessible:
root@rok-tools:~/ops/deployments# export EKS_CLUSTER_PUBLIC=<EKS_CLUSTER_PUBLIC>Replace
<EKS_CLUSTER_PUBLIC>withtrueorfalse. Usetrueto make your cluster API endpoint accessible from the internet. Usefalseto make it accessible only from your VPC.Air Gapped
Set
<EKS_CLUSTER_PUBLIC>tofalse.Save your state:
root@rok-tools:~/ops/deployments# rok-j2 deploy/env.eks-cluster.j2 \ > -o deploy/env.eks-clusterCommit your changes:
root@rok-tools:~/ops/deployments# git commit -am "Create EKS Cluster"Create EKS cluster:
root@rok-tools:~/ops/deployments# aws eks create-cluster \ > --name ${EKS_CLUSTER?} \ > --role-arn arn:aws:iam::${AWS_ACCOUNT_ID?}:role/${EKS_IAM_CLUSTER_ROLE?} \ > --resources-vpc-config subnetIds=${EKS_CLUSTER_SUBNETS// /,},endpointPublicAccess=${EKS_CLUSTER_PUBLIC?},endpointPrivateAccess=true,publicAccessCidrs=${EKS_TRUSTED_CIDRS// /,} \ > --kubernetes-version ${EKS_CLUSTER_VERSION?}Troubleshooting
AccessDenied
If the above command fails with an error message similar to the following:
An error occurred (AccessDeniedException) when calling the CreateCluster operation: User: arn:aws:iam::123456789012:user/user is not authorized to perform: eks:CreateCluster on resource: arn:aws:eks:us-east-1:123456789012:cluster/arrikto-clusterit means your IAM user does not have sufficient permissions to perform an action necessary to create the cluster.
To proceed, Check Your Environment and contact your AWS administrator to grant sufficient permissions to your IAM user.
Mark your progress:
root@rok-tools:~/ops/deployments# export DATE=$(date -u "+%Y-%m-%dT%H.%M.%SZ")root@rok-tools:~/ops/deployments# git tag \ > -a deploy/${DATE?}/release-2.0/eks-cluster \ > -m "Create EKS Cluster"Wait for the cluster to become ACTIVE:
root@rok-tools:~/ops/deployments# watch aws eks describe-cluster --name ${EKS_CLUSTER?} \ > --query cluster.status --output text ACTIVENote
Press
CTRL+Cto exit when you see the ACTIVE message.
Verify
Go to your GitOps repository, inside your
rok-toolsmanagement environment:root@rok-tools:~# cd ~/ops/deploymentsRestore the required context from previous sections:
root@rok-tools:~/ops/deployments# source <(cat deploy/env.{aws-subnets,eks-iam-cluster,\ > eks-cluster,aws-vpc})root@rok-tools:~/ops/deployments# export EKS_CLUSTER_SUBNETS AWS_SUBNETS_PUBLIC AWS_SUBNETS_PRIVATE \ > AWS_VPC_ID EKS_CLUSTEREnsure that all subnets that the EKS control plane will use are among the public and private subnets:
root@rok-tools:~/ops/deployments# echo ${EKS_CLUSTER_SUBNETS?} subnet-0b936cdc4fae6862a subnet-0110cc3509ed64a7e subnet-018e3b5b3ec930ccb subnet-074cebd1b78c50066 root@rok-tools:~/ops/deployments# echo ${AWS_SUBNETS_PUBLIC?} ${AWS_SUBNETS_PRIVATE?} subnet-0b936cdc4fae6862a subnet-0110cc3509ed64a7e subnet-018e3b5b3ec930ccb subnet-074cebd1b78c50066Ensure that the subnets that the EKS control plane will use do not all belong to the same availability zone. List the given subnets and ensure that the second column refers to at least two AZs across all subnets:
root@rok-tools:~/ops/deployments# aws ec2 describe-subnets \ > --subnet-ids ${EKS_CLUSTER_SUBNETS?} \ > --filter Name=vpc-id,Values=${AWS_VPC_ID?} \ > --query 'Subnets[].[SubnetId,AvailabilityZone]' \ > --output table -------------------------------------------- | DescribeSubnets | +---------------------------+--------------+ | subnet-0b936cdc4fae6862a | us-east-1a | | subnet-0110cc3509ed64a7e | us-east-1b | | subnet-018e3b5b3ec930ccb | us-east-1a | | subnet-074cebd1b78c50066 | us-east-1b | +---------------------------+--------------+Verify that the EKS cluster exists, that is, the following command produces an output:
root@rok-tools:~/ops/deployments# aws eks describe-cluster --name ${EKS_CLUSTER?} { "cluster": { "name": "arrikto-cluster", "arn": "arn:aws:eks:us-east-1:123456789012:cluster/arrikto-cluster", "createdAt": "2021-04-23T12:43:31.056000+00:00", "version": "1.23", "endpoint": "https://6E7720932E60AEA787E0E781931671F5.gr7.us-east-1.eks.amazonaws.com", "roleArn": "arn:aws:iam::123456789012:role/eksClusterRole", ...Verify that your cluster is ACTIVE:
root@rok-tools:~/ops/deployments# aws eks describe-cluster --name ${EKS_CLUSTER?} \ > --query "cluster.status" --output text ACTIVE
What’s Next
The next step is to enable IAM roles for Kubernetes service accounts.