
Authorize Access to Object Storage on AWS
This guide will walk you through configuring Rok to have access to object storage resources on AWS.
Fast Forward
If you have already configured Rok to have access to object storage, expand this box to fast-forward.
Go to your GitOps repository, inside your
rok-toolsmanagement environment:root@rok-tools:~# cd ~/ops/deploymentsSave your state:
root@rok-tools:~/ops/deployments# rok-j2 deploy/env.objectstorage.j2 \ > -o deploy/env.objectstorageCommit your changes:
root@rok-tools:~/ops/deployments# git commit -am "Authorize Access to Object Storage on AWS"Proceed to the Verify section.
Choose one of the following options to give Rok access to the object storage service:
- Option 1: Authorize Access to Object Storage Automatically (preferred).
- Option 2: Authorize Access to Object Storage Manually.
Air Gapped
Follow Option 2 and proceed with the manual installation.
Overview
What You’ll Need
- A configured management environment.
- Your clone of the Arrikto GitOps repository.
- An existing EKS cluster.
- A cloud identity with access to the AWS storage service.
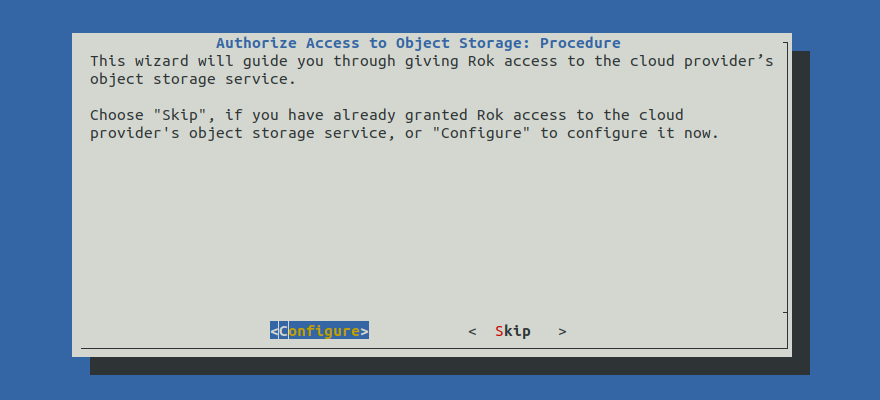
Option 1: Authorize Access to Object Storage Automatically (preferred)
Authorize Rok to access the object storage service by following the on-screen
instructions on the rok-deploy user interface.
If rok-deploy is not already running, start it with:
Proceed to the Summary section.
Option 2: Authorize Access to Object Storage Manually
If you want to authorize Rok to access the object storage service manually, follow the instructions below.
Procedure
Go to your GitOps repository, inside your
rok-toolsmanagement environment:root@rok-tools:~# cd ~/ops/deploymentsRestore the required context from previous sections:
root@rok-tools:~/ops/deployments# source <(cat deploy/env.{envvars-aws,cloudidentity})root@rok-tools:~/ops/deployments# export AWS_ACCOUNT_ID AWS_DEFAULT_REGION \ > AWS_S3_BUCKET_PREFIX AWS_S3_ROLEConfigure Rok to use the IAM role in order to access S3 storage:
root@rok-tools:~/ops/deployments# j2 \ > rok/rok-cluster/overlays/deploy/patches/storage.yaml.j2 \ > -o rok/rok-cluster/overlays/deploy/patches/storage.yamlConfigure Rok to use the S3 bucket prefix you specified:
root@rok-tools:~/ops/deployments# j2 \ > rok/rok-cluster/overlays/deploy/patches/configvars.yaml.j2 \ > -o rok/rok-cluster/overlays/deploy/patches/configvars.yamlImportant
Rok will create a number of buckets with this specific prefix. Please note that Rok assumes it owns all buckets with names starting with this prefix, for example, for garbage collection purposes. You must not share this prefix with any other application.
Save your state:
root@rok-tools:~/ops/deployments# rok-j2 deploy/env.objectstorage.j2 \ > -o deploy/env.objectstorageCommit your changes:
root@rok-tools:~/ops/deployments# git commit -am "Authorize Access to Object Storage on AWS"
Verify
Go to your GitOps repository, inside your
rok-toolsmanagement environment:root@rok-tools:~# cd ~/ops/deploymentsRestore the required context from previous sections:
root@rok-tools:~/ops/deployments# source <(cat deploy/env.{envvars-aws,\ > cloudidentity,eks-identity})root@rok-tools:~/ops/deployments# export AWS_ACCOUNT_ID AWS_DEFAULT_REGION \ > ROK_CLUSTER_NAMESPACE ROK_CLUSTER_NAME \ > AWS_S3_BUCKET_PREFIX AWS_S3_ROLE EKS_CLUSTER_OIDCBuild the manifests and make sure the output contains four lines:
root@rok-tools:~/ops/deployments# kustomize build rok/rok-cluster/overlays/deploy | \ > grep -o -e "daemons.s3d.bucket_prefix: ${AWS_S3_BUCKET_PREFIX?}" \ > -e "AWSRoleARN: arn:aws:iam::${AWS_ACCOUNT_ID?}:role/${AWS_S3_ROLE?}" \ > -e "endpoint: https://s3.${AWS_DEFAULT_REGION?}.amazonaws.com" \ > -e "region: ${AWS_DEFAULT_REGION?}" daemons.s3d.bucket_prefix: rok-123451234512-us-west-2-arrikto-cluster AWSRoleARN: arn:aws:iam::123451234512:role/rok-us-west-2-arrikto-cluster endpoint: https://s3.us-west-2.amazonaws.com region: us-west-2Deploy a Pod using the service account of Rok:
Create the Rok namespaces:
root@rok-tools:~/ops/deployments# rok-deploy --apply rok/rok-namespaces/overlays/deployRender the
rok-verify-service-account-eksmanifest template:root@rok-tools:~/ops/deployments# j2 rok/rok-test/rok-verify-service-account-eks.yaml.j2 \ > -o rok/rok-test/rok-verify-service-account-eks.yamlAlternatively, download the
rok-verify-service-account-eksmanifest template provided below and use it locally.rok-verify-service-account-eks.yaml.j2
1 # This file is part of Rok. 2 # 3 # Copyright © 2021 Arrikto Inc. All Rights Reserved. 4-10 4 5 apiVersion: v1 6 kind: ServiceAccount 7 metadata: 8 labels: 9 app.kubernetes.io/part-of: rok-verify 10 annotations: 11 eks.amazonaws.com/role-arn: arn:aws:iam::{{AWS_ACCOUNT_ID}}:role/{{AWS_S3_ROLE}} 12 name: {{ROK_CLUSTER_NAME}} 13 namespace: {{ROK_CLUSTER_NAMESPACE}} Render the
rok-verify-storage-access-eksmanifest template:root@rok-tools:~/ops/deployments# j2 rok/rok-test/rok-verify-storage-access-eks.yaml.j2 \ > -o rok/rok-test/rok-verify-storage-access-eks.yamlAlternatively, download the
rok-verify-storage-access-eksmanifest template provided below and use it locally.rok-verify-storage-access-eks.yaml.j2
1 # This file is part of Rok. 2 # 3 # Copyright © 2021 Arrikto Inc. All Rights Reserved. 4-26 4 5 apiVersion: v1 6 kind: Pod 7 metadata: 8 name: rok-verify-storage-access 9 namespace: {{ROK_CLUSTER_NAMESPACE}} 10 labels: 11 app: rok-verify-storage-access 12 spec: 13 serviceAccountName: {{ROK_CLUSTER_NAME}} 14 containers: 15 - name: rok-verify-storage-access 16 image: gcr.io/arrikto/rok-tools:release-2.0-l0-release-2.0.2 17 imagePullPolicy: IfNotPresent 18 workingDir: /root 19 env: 20 - name: AWS_S3_BUCKET_PREFIX 21 value: "{{AWS_S3_BUCKET_PREFIX}}" 22 - name: EKS_CLUSTER_OIDC 23 value: "{{EKS_CLUSTER_OIDC}}" 24 - name: ROK_CLUSTER_NAME 25 value: "{{ROK_CLUSTER_NAME}}" 26 - name: ROK_CLUSTER_NAMESPACE 27 value: "{{ROK_CLUSTER_NAMESPACE}}" 28 - name: AWS_DEFAULT_REGION 29 value: "{{AWS_DEFAULT_REGION}}" Air Gapped
Edit the rendered manifest
rok/rok-test/rok-verify-storage-access-eks.yamlto use the mirroredrok-toolsimage from your internal registry:containers: - name: rok-verify-storage-access image: gcr.io/arrikto/rok-tools:release-2.0-l0-release-2.0.2 # <-- Edit this line to point to your mirrored rok-tools imageCommit the changes:
root@rok-tools:~/ops/deployments# git commit -am "Configure Pod and SA to verify storage access"Create the
rokservice account:root@rok-tools:~/ops/deployments# kubectl create -f rok/rok-test/rok-verify-service-account-eks.yaml serviceaccount/rok createdTroubleshooting
The service account already exists
If you have already deployed Rok and created its service account, then the above command will fail with the following error:
Error from server (AlreadyExists): error when creating "rok/rok-test/rok-verify-service-account-eks.yaml": serviceaccounts "rok" already existsIn this case, ignore this error and proceed with the verification steps below.
Deploy the rendered
rok-verify-storage-access-eksmanifest to your EKS cluster:root@rok-tools:~/ops/deployments# kubectl apply -f rok/rok-test/rok-verify-storage-access-eks.yaml pod/rok-verify-storage-access createdWait for the
rok-verify-storage-accessPod to come up:root@rok-tools:~/ops/deployments# kubectl get pods rok-verify-storage-access -n ${ROK_CLUSTER_NAMESPACE?} NAME READY STATUS RESTARTS AGE rok-verify-storage-access 1/1 Running 0 20s
Verify the spec of the Pod:
Inspect the Pod spec and verify that the EKS Pod identity admission controller has extended it with the
AWS_ROLE_ARNandAWS_WEB_IDENTITY_TOKEN_FILEenvironment variables, as well as anaws-iam-tokenprojected service account token:root@rok-tools:~/ops/deployments# kubectl get pod rok-verify-storage-access -n ${ROK_CLUSTER_NAMESPACE?} -o yaml apiVersion: v1 kind: Pod [...] spec: containers: - env: [...] - name: AWS_ROLE_ARN value: arn:aws:iam::123456789012:role/rok-us-west-2-arrikto-cluster - name: AWS_WEB_IDENTITY_TOKEN_FILE value: /var/run/secrets/eks.amazonaws.com/serviceaccount/token [...] volumeMounts: [...] - mountPath: /var/run/secrets/eks.amazonaws.com/serviceaccount name: aws-iam-token readOnly: true [...] volumes: - name: aws-iam-token projected: defaultMode: 420 sources: - serviceAccountToken: audience: sts.amazonaws.com expirationSeconds: 86400 path: token [...]Compute the ARN of the IAM role you created for Rok:
root@rok-tools:~/ops/deployments# echo "arn:aws:iam::${AWS_ACCOUNT_ID?}:role/${AWS_S3_ROLE?}" arn:aws:iam::123456789012:role/rok-us-west-2-arrikto-clusterVerify that the ARN of the IAM role you created for Rok matches the value of the
AWS_ROLE_ARNenvironment variable in the Pod spec.Verify that the
audiencefield of the projected service account token of the Pod spec issts.amazonaws.com.
Verify the Pod credentials:
Enter the Pod:
root@rok-tools:~/ops/deployments# kubectl exec rok-verify-storage-access \ > -itn ${ROK_CLUSTER_NAMESPACE?} \ > -- /bin/bashDecode and inspect the web identity token projected into the Pod:
root@rok-verify-storage-access:~# cat ${AWS_WEB_IDENTITY_TOKEN_FILE?} | cut -d'.' -f2 | base64 -d | jq { "aud": [ "sts.amazonaws.com" ], "exp": 1630400784, "iat": 1630314384, "iss": "https://oidc.eks.us-west-2.amazonaws.com/id/C4384257372B0F97FEC2C5A47EF6EDAB", "kubernetes.io": { "namespace": "rok", "pod": { "name": "rok-verify-storage-access", "uid": "d835a896-54be-489e-ba6c-99d90c32ebbe" }, "serviceaccount": { "name": "rok", "uid": "a0068c4b-05a1-42a8-9a0e-03235280e7f6" } }, "nbf": 1630314384, "sub": "system:serviceaccount:rok:rok" }Verify that the
audfield of the web identity token issts.amazonaws.com.Find the URL of the OIDC provider of the EKS cluster:
root@rok-verify-storage-access:~# echo "https://${EKS_CLUSTER_OIDC?}" https://oidc.eks.us-west-2.amazonaws.com/id/C4384257372B0F97FEC2C5A47EF6EDABVerify that the
issfield of the web identity token matches the URL of the OIDC provider of the EKS cluster.Find the Rok cluster namespace and name:
root@rok-verify-storage-access:~# echo ${ROK_CLUSTER_NAMESPACE?} rok root@rok-verify-storage-access:~# echo ${ROK_CLUSTER_NAME?} rokVerify that the
kubernetes.io.namespacefield of the web identity token matches the Rok cluster namespace.Verify that the
kubernetes.io.pod.namefield of the web identity token isrok-verify-storage-access.Verify that the
kubernetes.io.serviceaccount.namefield of the web identity token matches the Rok cluster name.Compute the Kubernetes username for the Rok service account:
root@rok-verify-storage-access:~# echo system:serviceaccount:${ROK_CLUSTER_NAMESPACE?}:${ROK_CLUSTER_NAME?} system:serviceaccount:rok:rokVerify that the
subfield of the web identity token matches the username of the Rok service account.
Perform a request towards S3:
List versions in a Rok S3 bucket:
root@rok-verify-storage-access:~# aws s3api list-object-versions \ > --bucket ${AWS_S3_BUCKET_PREFIX?}-chocks-ca An error occurred (NoSuchBucket) when calling the ListObjectVersions operation: The specified bucket does not existTroubleshooting
The
AssumeRoleWithWebIdentityoperation failed withAccessDeniedIf the above command failed with the following error:
An error occurred (AccessDenied) when calling the AssumeRoleWithWebIdentity operation: Not authorized to perform sts:AssumeRoleWithWebIdentitythen this means that you have not authorized the Pod’s web identity to assume the IAM role for Rok. Make sure you have followed the Create Cloud Identity section to set up the policies for the IAM role you created for Rok.
The
ListObjectVersionsoperation failed withAccessDeniedIf the above command failed with the following error:
An error occurred (AccessDenied) when calling the ListObjectVersions operation: Access Deniedthen this means that the Pod can assume the IAM role for Rok with its web identity, but the role does not have sufficient permissions to perform the
ListObjectVersionscall. In this case, do the following:- Make sure you are using the bucket prefix specified in the Option 2: Authorize Access to Object Storage Manually section, and not a custom one.
- Make sure you have followed the Create Cloud Identity section to set up the policies for the IAM role you created for Rok.
Check the output of the above command. If the output is empty, or it lists some versions, this means that you have successfully assumed the IAM role for Rok and authorized a request with it. In this case, proceed with the next step. Otherwise, if the command failed with
NoSuchBucket, run the following extra steps:Create the Rok S3 bucket:
root@rok-verify-storage-access:~# export BUCKET_CONFIGURATION="--create-bucket-configuration LocationConstraint=${AWS_DEFAULT_REGION?}"root@rok-verify-storage-access:~# [[ $AWS_DEFAULT_REGION == "us-east-1" ]] \ > && export BUCKET_CONFIGURATION=""root@rok-verify-storage-access:~# aws s3api create-bucket \ > --bucket ${AWS_S3_BUCKET_PREFIX?}-chocks-ca \ > --region ${AWS_DEFAULT_REGION?} \ > ${BUCKET_CONFIGURATION?} { "Location": "http://rok-123451234512-us-west-2-arrikto-cluster-chocks-ca.s3.amazonaws.com/" }Troubleshooting
The
AssumeRoleWithWebIdentityoperation failed withAccessDeniedIf the above command failed with the following error:
An error occurred (AccessDenied) when calling the AssumeRoleWithWebIdentity operation: Not authorized to perform sts:AssumeRoleWithWebIdentitythen this means that you have not authorized the Pod’s web identity to assume the IAM role for Rok. Make sure you have followed the Create Cloud Identity section to set up the policies for the IAM role you created for Rok.
The
CreateBucketoperation failed withAccessDeniedIf the above command failed with the following error:
An error occurred (AccessDenied) when calling the CreateBucket operation: Access Deniedthen this means that the Pod can assume the IAM role for Rok with its web identity, but the role does not have sufficient permissions to perform the
CreateBucketcall. In this case, do the following:- Make sure you are using the bucket prefix specified in the Option 2: Authorize Access to Object Storage Manually section, and not a custom one.
- Make sure you have followed the Create Cloud Identity section to set up the policies for the IAM role you created for Rok.
List versions in the Rok S3 bucket:
root@rok-verify-storage-access:~# aws s3api list-object-versions \ > --bucket ${AWS_S3_BUCKET_PREFIX?}-chocks-caTroubleshooting
The
AssumeRoleWithWebIdentityoperation failed withAccessDeniedIf the above command failed with the following error:
An error occurred (AccessDenied) when calling the AssumeRoleWithWebIdentity operation: Not authorized to perform sts:AssumeRoleWithWebIdentitythen this means that you have not authorized the Pod’s web identity to assume the IAM role for Rok. Make sure you have followed the Create Cloud Identity section to set up the policies for the IAM role you created for Rok.
The
ListObjectVersionsoperation failed withAccessDeniedIf the above command failed with the following error:
An error occurred (AccessDenied) when calling the ListObjectVersions operation: Access Deniedthen this means that the Pod can assume the IAM role for Rok with its web identity, but the role does not have sufficient permissions to perform the
ListObjectVersionscall. In this case, do the following:- Make sure you are using the bucket prefix specified in the Option 2: Authorize Access to Object Storage Manually section, and not a custom one.
- Make sure you have followed the Create Cloud Identity section to set up the policies for the IAM role you created for Rok.
Ensure that the output of the above command is empty. This means that you have successfully assumed the IAM role for Rok and authorized a request with it.
Clean up the Pod:
Return to your management environment:
root@rok-verify-storage-access:~# exitDelete the Pod:
root@rok-tools:~/ops/deployments# kubectl delete -f rok/rok-test/rok-verify-storage-access-eks.yaml pod "rok-verify-storage-access" deletedDelete the Rok service account, if you created it in this Verify section (step 4e):
root@rok-tools:~/ops/deployments# kubectl delete sa -n ${ROK_CLUSTER_NAMESPACE} \ > -l "app.kubernetes.io/part-of=rok-verify" serviceaccount "rok" deleted
Summary
You have successfully provided Rok with access to the object storage service of your cloud provider.
What’s Next
The next step is to grant Rok access to Arrikto’s private container registry, so that it can pull images from it.