
TensorFlow Keras Distributed with Kale
This section will guide you through creating and managing a TFJob CR on
Kubeflow, with Kale and the Kubeflow Training Operator.
For this guide, we leverage the interactive environment of JupyterLab, but this
is completely optional. We do it to demonstrate how you can monitor such a job
using Kale’s TFJob client.
Note
Currently, Kale supports the TensorFlow Keras API for creating and launching TensorFlow distributed jobs. In future versions, we plan to support the TensorFlow Estimator API as well.
Overview
What You’ll Need
- An Arrikto EKF or MiniKF deployment.
- The Kale TensorFlow Docker image.
Procedure
Create a new notebook server using the Kale TensorFlow Docker image. The image will have the following naming scheme:
gcr.io/arrikto/jupyter-kale-gpu-tf-py38:<IMAGE_TAG>Note
The
<IMAGE_TAG>varies based on the MiniKF or EKF release.This is not the default Kale image, so you must carefully choose it from the dropdown menu.
Note
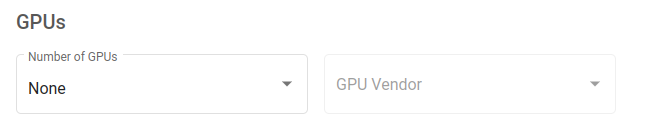
If you want to have access to a GPU device, you must specifically request one or more from the Jupyter Web App UI. For this user guide, access to a GPU device is not required.
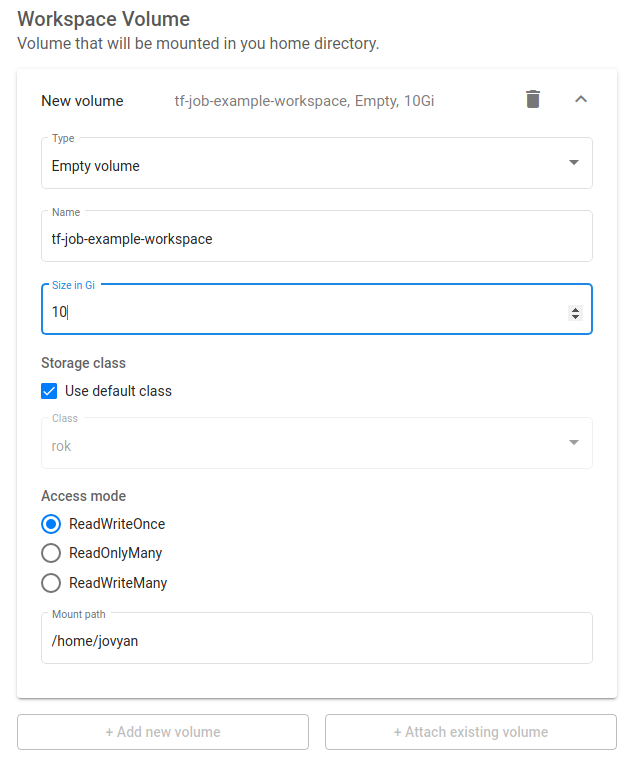
Increase the size of the workspace volume to 10GB:
Connect to the server, open a terminal, and install the
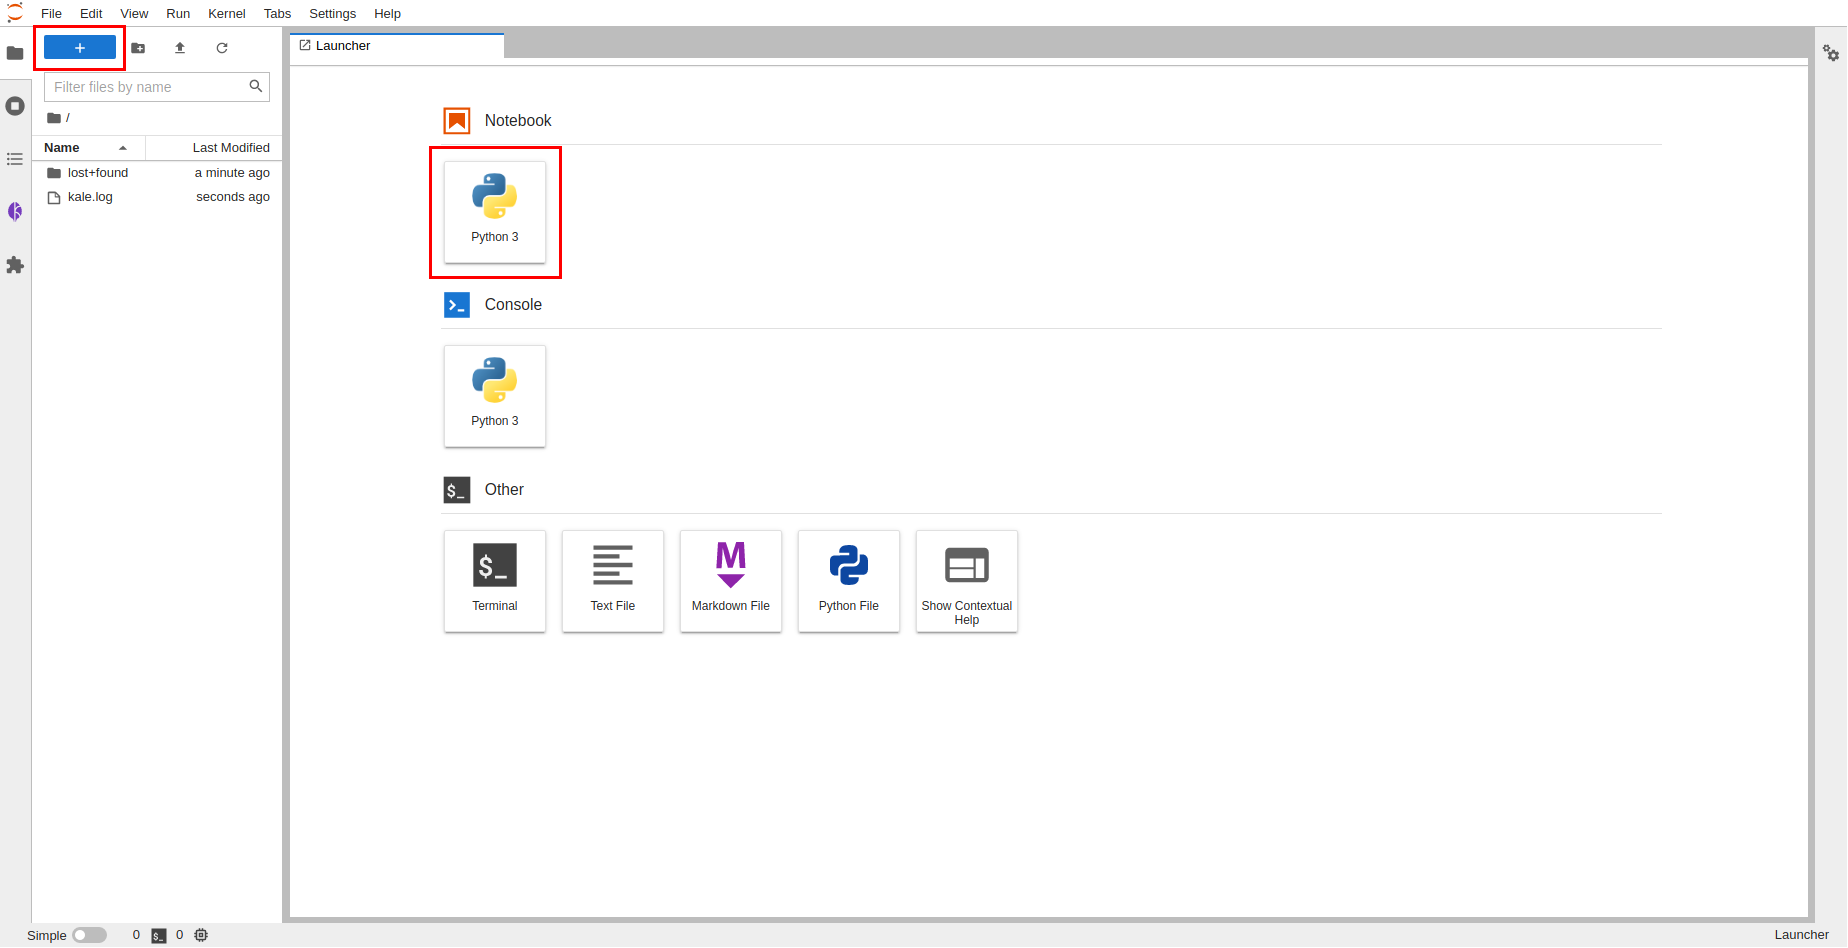
tensorflow-datasetspackage:$ pip3 install --user tensorflow-datasetsCreate a new Jupyter notebook (that is, an IPYNB file) using the JupyterLab UI:
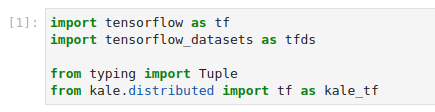
Copy and paste the import statements on the top code cell. Then run it:
This is how your notebook cell will look like:
Create a function which downloads the MNIST dataset. Copy and paste the following code snippet to a new code cell. Then run it:
This is how your notebook cell will look like:
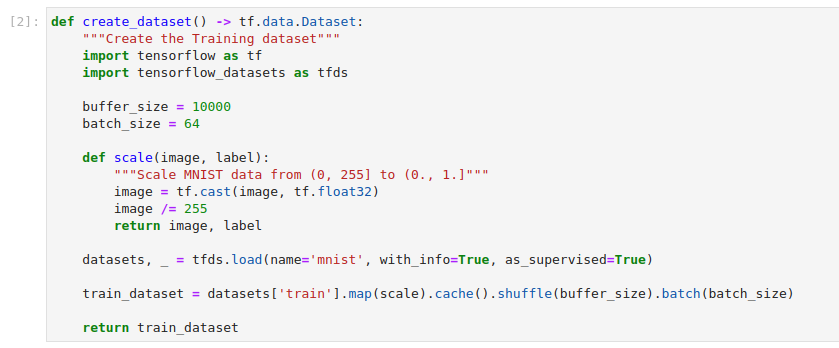
This cell creates a function which downloads the MNIST dataset. You will use the training split, scale it and create batches of 64 samples.
Define a function that creates, compiles, and returns a
tf.kerasModel. Copy and paste the following code snippet to a new code cell. Then run it:This is how your notebook cell will look like:
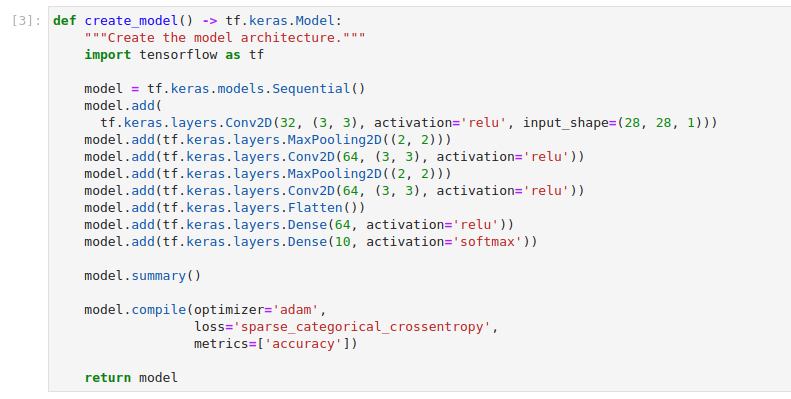
This cell defines a function that creates a standard Convolutional Neural Network architecture. It sets
adamas the trainining process optimizer, the loss function tosparse_categorical_corssentropy, and the accuracy metric. You will train this model architecture on the MNIST dataset in a distributed manner.Create and submit a
TFJobCR. Copy and paste the following code snippet to a new code cell. Then run it:This is how your notebook cell will look like:
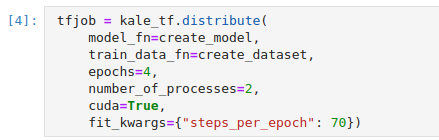
At a high level, the
distributefunction follows this process:- Save several assets to a local folder, including the training dataset and the model definition function.
- Snapshot the volumes mounted to the notebook server.
- Hydrate new PVCs starting from the snapshots of the previous step.
- Create and submit a
TFJobCR. All the workers mount the newly created PVCs as RWX.
Upon submission of the CR, the Training Operator creates the two processes you requested with the
number_of_processesargument. By default, each process requests to consume a GPU device. These Pods run a Kale entrypoint which- Looks for the assets saved during the preparation phase in the local FS (backed by one of the RWX PVCs), and loads them into memory.
- Creates a suitable TensorFlow distribution strategy.
- Instantiates and compiles the model inside the scope of this strategy.
- Calls the model’s
fitfunction to start the training process.
Note
The TF Keras
fitfunction accepts a number of different arguments. To view the list of arguments that thefitfunction accepts see the TF Keras documentation. You can pass any of those arguments in thefit_kwargsargument of thedistributefunction, as a Python dictionary. Kale will make sure to pass it down the line. However, you cannot pass values forx, andyarguments. Kale expects you to use thetrain_data_fnargument to provide a function that creates the dataset. Then, Kale knows how to populate thexandyarguments.Note
If you want to distribute your model across multiple CPU cores, you can set the
cudaargument toFalse. By default, Kale will launch two processes (the minimum number of processes required by theTFJobCR), on two different GPU devices.Monitor the
TFJobCR. Copy and paste the following code snippet to a new code cell. Then run it:This is how your notebook cell will look like:

Note
In this step you monitor the state of the Job. The state can be in one of the following states:
Created,Running,Failed, orSucceeded. This call blocks until the training process finishes. To continue with the next step and view the logs, you can stop the interpreter by pressing the stop button in the notebook UI. Instead of the above, you can call theget_job_statusfunction of the client with no arguments. The function will return immediately, reporting back the current status of the Job.Stream the logs of the master process. Copy and paste the following code snippet to a new code cell. Then run it:
This is how your notebook cell will look like:

Note
In this step you view the logs of the Pod-running worker with index
0. You can view the logs of any other worker as well, however, in most cases, they are identical. This call blocks until the training process finishes. If you want to continue executing other notebook cells, you can stop the interpreter by pressing the stop button in the notebook UI.Optional
When the training process completes, you can delete the
TFJobCR. Copy and paste the following code snippet to a new code cell. Then run it:This is how your notebook cell will look like:

Important
After the completion of the training process, the controller will not remove the resources it creates. If you do not want to leave stale resources, you have to manually delete the CR using the above command.
Summary
You have successfully run a TF Keras distributed process using Kale and the Kubeflow Training Operator.
What’s Next
The next step is to create a TF Keras distributed KFP step using the Kale SDK.