
Deploy Rok Components
At this point, you have configured everything and you are ready to install Rok. This guide will walk you through deploying Rok. More specifically, you will create the Rok namespaces and then deploy Rok Operator, Rok kmod, external services, and RokCluster CR.
Fast Forward
If you have already deployed the Rok components, expand this box to fast-forward.
Go to your GitOps repository, inside your
rok-toolsmanagement environment:root@rok-tools:~# cd ~/ops/deploymentsSave your state:
root@rok-tools:~/ops/deployments# rok-j2 deploy/env.rok.j2 -o deploy/env.rokCommit your changes:
root@rok-tools:~/ops/deployments# git commit -am "Deploy Rok Components"Proceed to the Verify section.
Choose one of the following options to deploy Rok:
- Option 1: Deploy Rok Components Automatically (preferred).
- Option 2: Deploy Rok Components Manually.
Air Gapped
Follow Option 2 and proceed with the manual installation.
Overview
What You’ll Need
- A configured management environment.
- Your clone of the Arrikto GitOps repository.
- An existing Kubernetes cluster.
- A cloud identity with access to your cloud provider’s storage service.
- Access to your cloud provider’s object storage service for Rok..
- Access to Arrikto’s private container registry.
- A configured Rok user.
- Account management for Rok.
- A Rok version that supports the kernel of your Kubernetes nodes.
Option 1: Deploy Rok Components Automatically (preferred)
Choose one of the following options, based on your cloud provider.
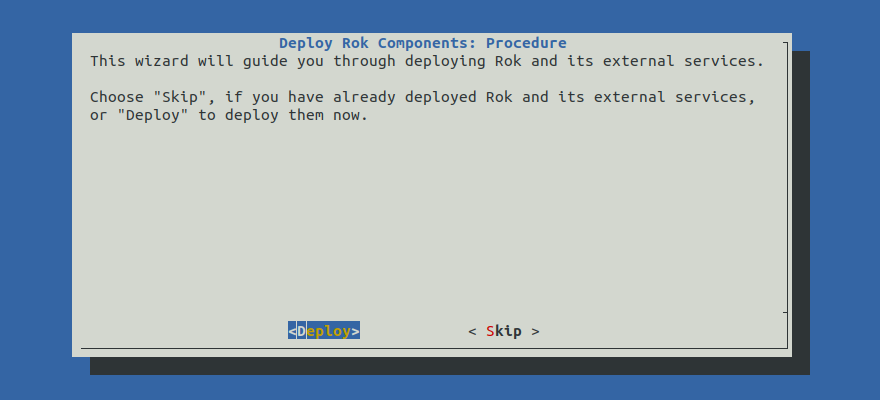
Deploy Rok by following the on-screen instructions on the rok-deploy
user interface.
If rok-deploy is not already running, start it with:
Proceed to the Summary section.
Option 2: Deploy Rok Components Manually
If you want to deploy Rok manually, follow the instructions below.
Procedure
Go to your GitOps repository, inside your
rok-toolsmanagement environment:root@rok-tools:~# cd ~/ops/deploymentsDeploy the Rok Operator:
root@rok-tools:~/ops/deployments# rok-deploy --apply rok/rok-operator/overlays/deployDeploy Rok kmod:
root@rok-tools:~/ops/deployments# rok-deploy --apply rok/rok-kmod/overlays/deployDeploy etcd.
Edit the kustomization manifest. Choose one of the following options, based on your cloud provider:
Edit
rok/rok-external-services/etcd/overlays/deploy/kustomization.yamlto use theeksoverlay as base:bases: - ../eks # <-- Edit this line to point to the eks overlayEdit
rok/rok-external-services/etcd/overlays/deploy/kustomization.yamlto use theaksoverlay as base:bases: - ../aks # <-- Edit this line to point to the aks overlayEdit
rok/rok-external-services/etcd/overlays/deploy/kustomization.yamlto use thegkeoverlay as base:bases: - ../gke # <-- Edit this line to point to the gke overlaySpecify the desired etcd cluster size:
root@rok-tools:~/ops/deployments# export ETCD_CLUSTER_SIZE=3Render the patch for the etcd cluster size:
root@rok-tools:~/ops/deployments# j2 \ > rok/rok-external-services/etcd/overlays/deploy/patches/cluster-size.yaml.j2 \ > -o rok/rok-external-services/etcd/overlays/deploy/patches/cluster-size.yamlCommit your changes:
root@rok-tools:~/ops/deployments# git commit -am "Configure etcd for our cloud provider"Apply the manifests:
root@rok-tools:~/ops/deployments# rok-deploy --apply \ > rok/rok-external-services/etcd/overlays/deploy
Deploy Redis.
Edit the kustomization manifest. Choose one of the following options, based on your cloud provider:
Edit
rok/rok-external-services/redis/overlays/deploy/kustomization.yamlto set theeksoverlay as base:bases: - ../eks # <-- Edit this line to point to the eks overlayEdit
rok/rok-external-services/redis/overlays/deploy/kustomization.yamlto set theaksoverlay as base:bases: - ../aks # <-- Edit this line to point to the aks overlayEdit
rok/rok-external-services/redis/overlays/deploy/kustomization.yamlto set thegkeoverlay as base:bases: - ../gke # <-- Edit this line to point to the gke overlayCommit your changes:
root@rok-tools:~/ops/deployments# git commit -am \ > "Configure Redis for our cloud provider"Apply the manifests:
root@rok-tools:~/ops/deployments# rok-deploy --apply \ > rok/rok-external-services/redis/overlays/deploy
Deploy S3Proxy (Azure only):
root@rok-tools:~/ops/deployments# rok-deploy --apply \ > rok/rok-external-services/s3proxy/overlays/deployDeploy the
kubeflownamespace:root@rok-tools:~/ops/deployments# rok-deploy --apply \ > kubeflow/manifests/common/kubeflow-namespace/overlays/deployDeploy the Kubeflow Gateway in the
kubeflownamespace:root@rok-tools:~/ops/deployments# rok-deploy --apply \ > kubeflow/manifests/common/istio-1-14/kubeflow-istio-resources/overlays/deployDeploy cert-manager resources, needed by the skel resources:
root@rok-tools:~/ops/deployments# rok-deploy --apply \ > rok/cert-manager/cert-manager/overlays/deployDeploy Kyverno resources, needed by the skel resources:
root@rok-tools:~/ops/deployments# rok-deploy --apply rok/kyverno/overlays/deployDeploy CRDs needed by the skel resources:
root@rok-tools:~/ops/deployments# rok-deploy --apply \ > kubeflow/manifests/apps/admission-webhook/upstream/overlays/deployDeploy the skel resources:
root@rok-tools:~/ops/deployments# rok-deploy --apply \ > kubeflow/manifests/common/skel-resources/overlays/deployDeploy the Reception server in the
kubeflownamespace:root@rok-tools:~/ops/deployments# rok-deploy --apply \ > kubeflow/manifests/apps/reception/overlays/deployImportant
When a user logs in to Arrikto EKF for the first time, the Reception server will create a new Profile for this user. The Profile Controller will then handle this new Profile and create a dedicated namespace for this user.
To disable the automatic Profile creation, and consequently the automatic creation of dedicated user namespaces, follow the Disable Automatic Profile Creation guide.
Deploy the Profile Controller in the
kubeflownamespace:root@rok-tools:~/ops/deployments# rok-deploy --apply \ > kubeflow/manifests/apps/profiles/upstream/overlays/deployDeploy roles necessary for RBAC configuration:
root@rok-tools:~/ops/deployments# rok-deploy --apply \ > kubeflow/manifests/common/kubeflow-roles/overlays/deployOptional
If the
kubeletroot directory of your cluster is not the default/var/lib/kubelet, configure Rok to use the directory of your installation:Set the
kubeletroot directory used in your installation:root@rok-tools:~/ops/deployments# export KUBELET_ROOT_DIR=<KUBELET_ROOT_DIR>Replace
<KUBELET_ROOT_DIR>with yourkubeletroot directory. For example:root@rok-tools:~/ops/deployments# export KUBELET_ROOT_DIR=/var/lib/kubeletConfigure the Rok Cluster to use the
kubeletroot directory that you specified in the previous step:root@rok-tools:~/ops/deployments# j2 \ > rok/rok-cluster/overlays/deploy/patches/kubelet-root-dir.yaml.j2 \ > -o rok/rok-cluster/overlays/deploy/patches/kubelet-root-dir.yamlEdit
rok/rok-cluster/overlays/deploy/kustomization.yamland enable thekubelet-root-dirpatch:patches: - path: patches/storage.yaml - path: patches/retention.yaml - path: patches/configvars.yaml - path: patches/image-pull-secrets.yaml - path: patches/kubelet-root-dir.yaml # <-- Add this lineCommit your changes:
root@rok-tools:~/ops/deployments# git commit -am "Configure kubelet root directory"
Deploy the RokCluster CR:
root@rok-tools:~/ops/deployments# rok-deploy --apply rok/rok-cluster/overlays/deployDeploy Dex in the
authnamespace:root@rok-tools:~/ops/deployments# rok-deploy --apply \ > kubeflow/manifests/common/dex/overlays/deployNote
Dex runs as a StatefulSet that requires storage from Rok.
Deploy AuthService in the
istio-systemnamespace:root@rok-tools:~/ops/deployments# rok-deploy --apply \ > kubeflow/manifests/common/oidc-authservice/overlays/deployDeploy the Rok Monitoring Stack in the
monitoringnamespace:root@rok-tools:~/ops/deployments# rok-deploy --apply rok/monitoring/overlays/deployImportant
By default no user has access to the Rok Monitoring Stack. To allow access to specific users follow the Grant Rok Monitoring Stack Admin Privileges guide.
See also
- Learn more about the Rok Monitoring Stack on the EKF Monitoring user guide.
Deploy Istio related resources for EKF:
root@rok-tools:~/ops/deployments# rok-deploy --apply rok/expose-ekf/overlays/deployNote
This will not expose EKF to the outer world yet. This will be done in the Expose EKF guide.
Save your state:
root@rok-tools:~/ops/deployments# rok-j2 deploy/env.rok.j2 -o deploy/env.rokCommit your changes:
root@rok-tools:~/ops/deployments# git commit -am "Deploy Rok Components"Mark your progress:
root@rok-tools:~/ops/deployments# export DATE=$(date -u "+%Y-%m-%dT%H.%M.%SZ")root@rok-tools:~/ops/deployments# git tag \ > -a deploy/${DATE?}/release-2.0/rok \ > -m "Deploy Rok Components"
Verify
Go to your GitOps repository, inside your
rok-toolsmanagement environment:root@rok-tools:~# cd ~/ops/deploymentsRestore the required context from previous sections:
root@rok-tools:~/ops/deployments# source <(cat deploy/env.cloudidentity)root@rok-tools:~/ops/deployments# export ROK_CLUSTER_NAMESPACEVerify that the Rok Operator, Rok Disk Manager, and Rok kmod Pods are up and running. Check the Pod status and verify field STATUS is Running and field READY is N/N for all Pods:
root@rok-tools:~/ops/deployments# kubectl -n rok-system get pods NAME READY STATUS RESTARTS AGE rok-disk-manager-tmwqz 1/1 Running 0 31s rok-kmod-8g48m 1/1 Running 0 37s rok-operator-0 2/2 Running 0 59sVerify that the Dex Pod is up and running. Check the Pod status and verify field STATUS is Running and field READY is 2/2:
root@rok-tools:~/ops/deployments# kubectl -n auth get pods NAME READY STATUS RESTARTS AGE dex-0 2/2 Running 0 65sVerify that the AuthService Pod is up and running. Check the Pod status and verify field STATUS is Running and field READY is 1/1:
root@rok-tools:~/ops/deployments# kubectl get pods -n istio-system -l app=authservice NAME READY STATUS RESTARTS AGE authservice-0 1/1 Running 0 9m27sVerify that the cert-manager Pods are up and running. Check the Pod status and verify field STATUS is Running and field READY is 1/1 for all Pods:
root@rok-tools:~/ops/deployments# kubectl -n cert-manager get pods NAME READY STATUS RESTARTS AGE cert-manager-6d86476c77-bl9rs 1/1 Running 0 9m cert-manager-cainjector-5b9cd446fd-n5jpd 1/1 Running 0 9m cert-manager-webhook-64d967c45-cdfwh 1/1 Running 0 9mVerify that the Kyverno Pod is up and running. Check the Pod status and verify field STATUS is Running and field READY is 1/1:
root@rok-tools:~/ops/deployments# kubectl -n kyverno get pods NAME READY STATUS RESTARTS AGE kyverno-544fc576bb-gbc9l 1/1 Running 0 9mVerify that the skel resources, Reception server, and Profile Controller Pods are up and running. Check the Pod status and verify field STATUS is Running and field READY is N/N for all Pods:
root@rok-tools:~/ops/deployments# kubectl -n kubeflow get pods NAME READY STATUS RESTARTS AGE admission-webhook-deployment-5d4cf6bbdb-gfrkv 2/2 Running 0 9m kubeflow-reception-54497df69c-psvvp 2/2 Running 0 9m profiles-deployment-6777bccfdc-l4l6z 3/3 Running 0 9mVerify that the
rok-initjob has completed successfully. Check the job status and verify field COMPLETIONS is 2/2:root@rok-tools:~/ops/deployments# kubectl -n ${ROK_CLUSTER_NAMESPACE?} get job NAME COMPLETIONS DURATION AGE rok-init 2/2 59s 24mVerify that the etcd, Redis, Rok CSI, and Rok Pods are up and running. Check the Pod status and verify field STATUS is Running and field READY is N/N for all Pods:
root@rok-tools:~/ops/deployments# kubectl -n ${ROK_CLUSTER_NAMESPACE?} get pods NAME READY STATUS RESTARTS AGE rok-9brt8 2/2 Running 0 5m23s rok-csi-controller-0 5/5 Running 0 5m21s rok-csi-guard-ip--172-31-18-161.eu-central-1... 1/1 Running 0 5m21s rok-csi-node-49ncb 3/3 Running 0 5m22s rok-etcd-0 2/2 Running 0 7m11s rok-redis-0 3/3 Running 0 6m51sVerify that the Rok cluster is up and running. Verify that field HEALTH is OK and field PHASE is Running:
root@rok-tools:~/ops/deployments# kubectl get rokcluster -n ${ROK_CLUSTER_NAMESPACE?} rok NAME VERSION HEALTH TOTAL MEMBERS READY MEMBERS PHASE AGE rok release-1.5-l0-release-1.5 OK 2 2 Running 2m4sVerify that the Rok Monitoring Stack is up and running:
root@rok-tools:~/ops/deployments# kubectl get pods -n monitoring NAME READY STATUS RESTARTS AGE grafana-6d7d7b78f7-6flm7 2/2 Running 0 2m17s kube-state-metrics-765c7c7f95-chkzn 4/4 Running 0 2m16s node-exporter-zng26 2/2 Running 0 2m16s prometheus-k8s-0 3/3 Running 1 2m15s prometheus-operator-5f75d76f9f-fmpp5 3/3 Running 0 8m24sEnsure that Prometheus has successfully discovered the needed targets so that it can pull metrics periodically:
root@rok-tools:~/ops/deployments# kubectl exec -ti -n monitoring sts/prometheus-k8s \ > -c prometheus -- wget -qO - localhost:9090/metrics | grep 'discovered.*rok-metrics' prometheus_sd_discovered_targets{config="serviceMonitor/rok/rok-metrics/0",name="scrape"} 7root@rok-tools:~/ops/deployments# kubectl exec -ti -n monitoring sts/prometheus-k8s \ > -c prometheus -- wget -qO - localhost:9090/metrics | grep 'discovered.*rok-etcd-metrics' prometheus_sd_discovered_targets{config="serviceMonitor/rok/rok-etcd-metrics/0",name="scrape"} 7root@rok-tools:~/ops/deployments# kubectl exec -ti -n monitoring sts/prometheus-k8s \ > -c prometheus -- wget -qO - localhost:9090/metrics | grep 'discovered.*rok-redis-metrics' prometheus_sd_discovered_targets{config="serviceMonitor/rok/rok-redis-metrics/0",name="scrape"} 7