
Okta
This section will guide you through using Okta as an OIDC provider for Kubeflow.
Overview
What You’ll Need
- A configured management environment.
- Your clone of the Arrikto GitOps repository.
- An existing Kubernetes cluster.
- A working Rok deployment.
- A working Kubeflow deployment.
- Access to the cluster running services.
- An admin account on Okta.
Procedure
Sign in to the Okta admin console with your admin account.
From your admin console expand the Applications tab and select Applications on the left sidebar.
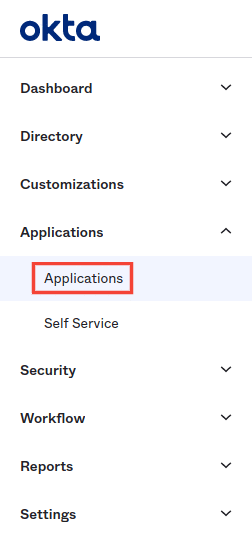
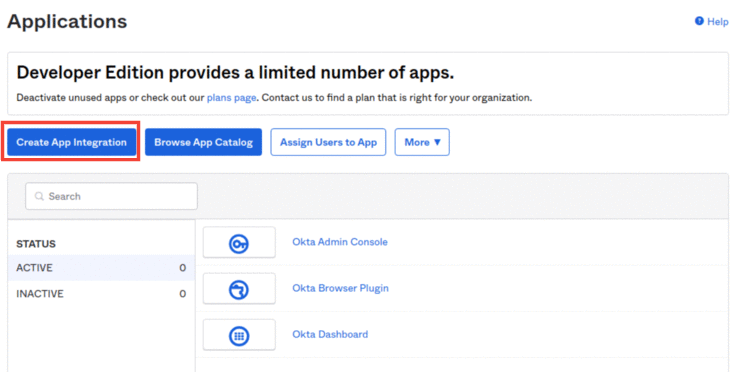
Then, select Create App Integration.
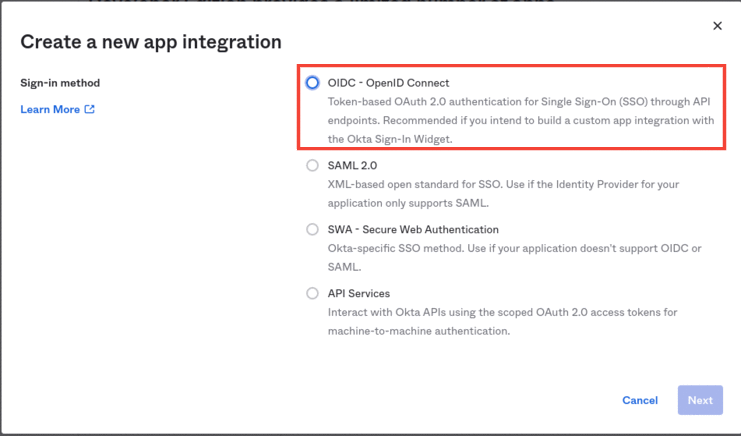
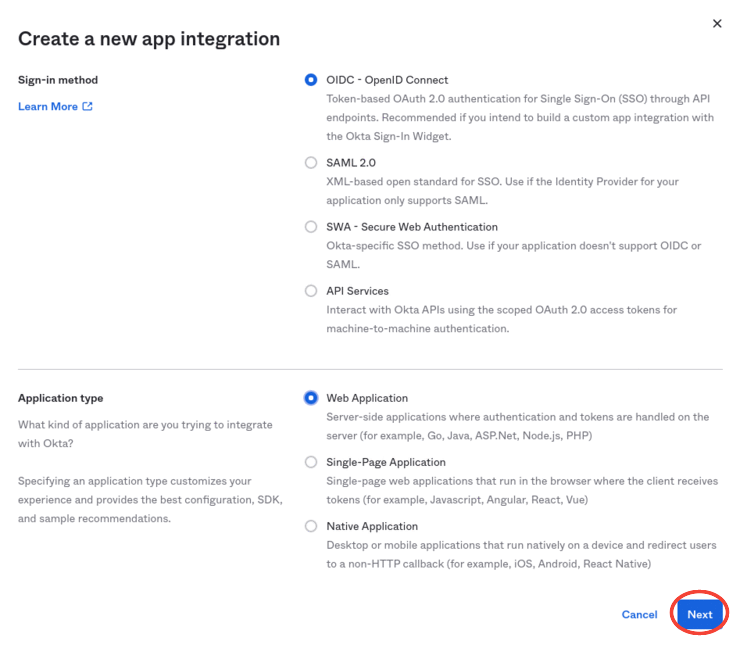
For the new app integration, follow the a-i steps below.
Select the OIDC - OpenID Connect as the Sign-in method.
Select the Web Application as the Application type .
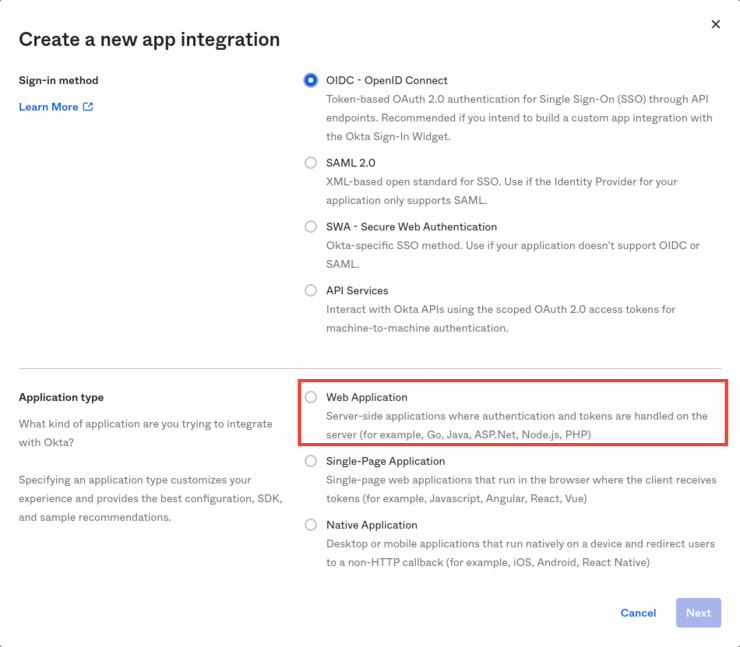
Click Next.
Give the proper App integration name for your application, for example
Kubeflow.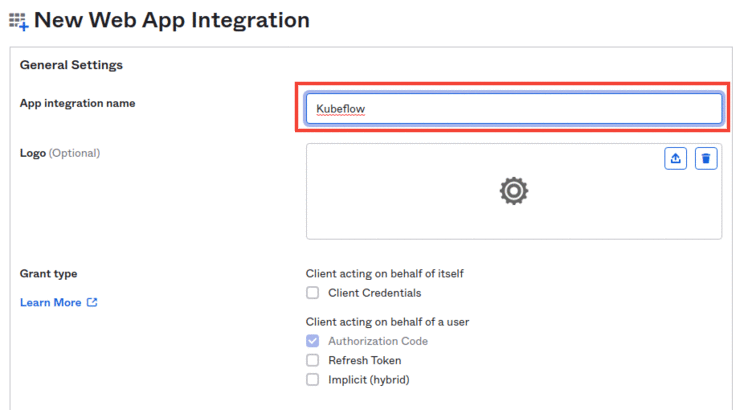
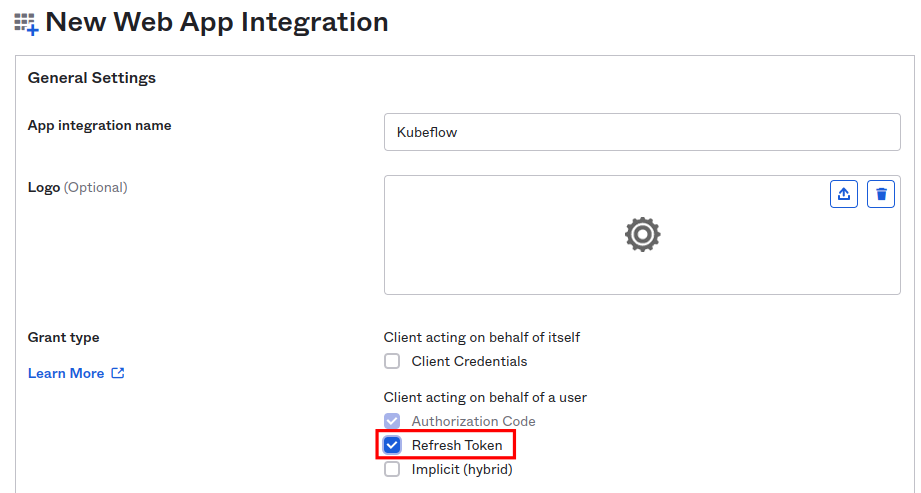
Under the Grant type section enable Refresh Token.
Under the Sign-in redirect URIs section click on the +Add URI button.

Enter
https://<FQDN>/authservice/oidc/callback. Replace<FQDN>with the FQDN of cluster, for example,arrikto-cluster.apps.example.com. In this case, the sign-in redirect URI ishttps://arrikto-cluster.apps.example.com/authservice/oidc/callback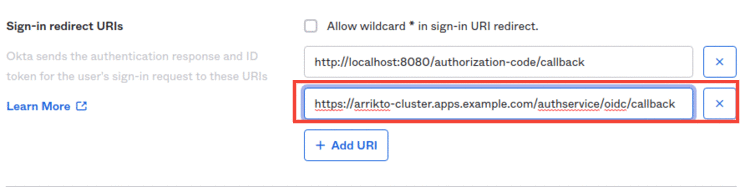
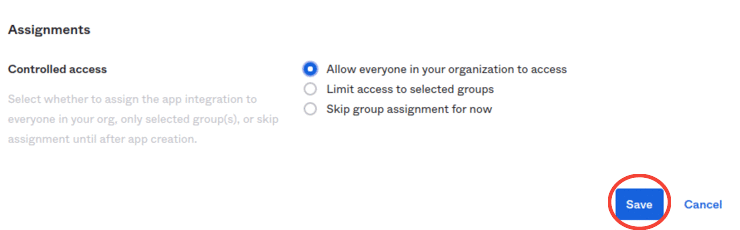
Under the Assignments section select the Allow everyone in your organization to access option.
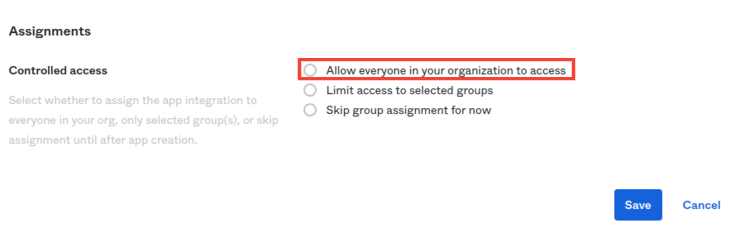
Click Save.
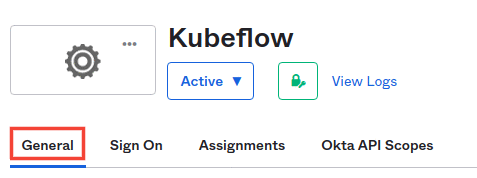
Click on the General tab for your application.
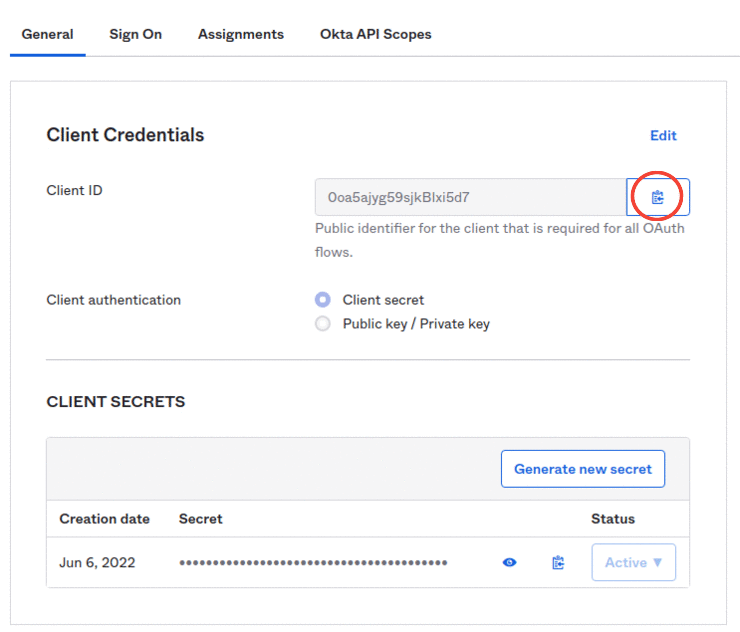
Under the Client Credentials section you can find both the
CLIENT ID, andCLIENT SECRET.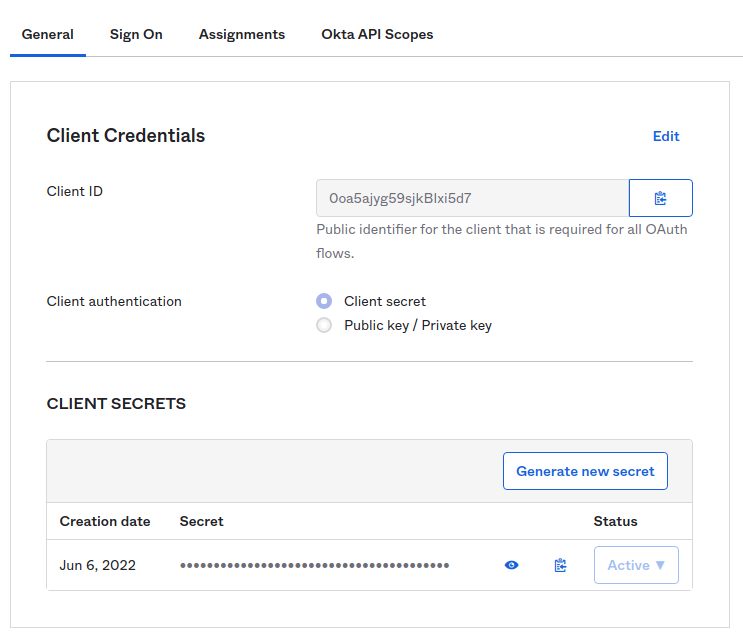
Click on the Copy to clipboard icon for the Client ID field and copy this value to your clipboard.
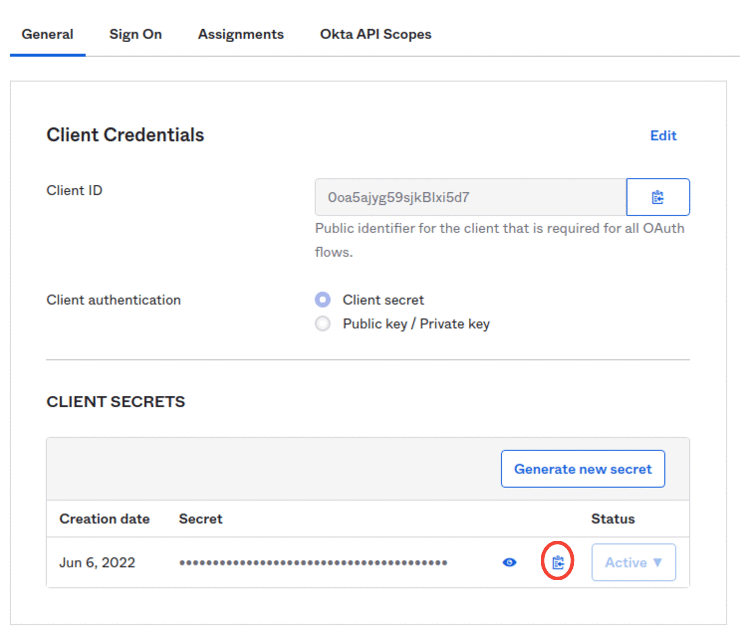
Under the CLIENT SECRETS subsection, click on the Copy to clipboard icon to copy the client secret of your application to your clipboard.
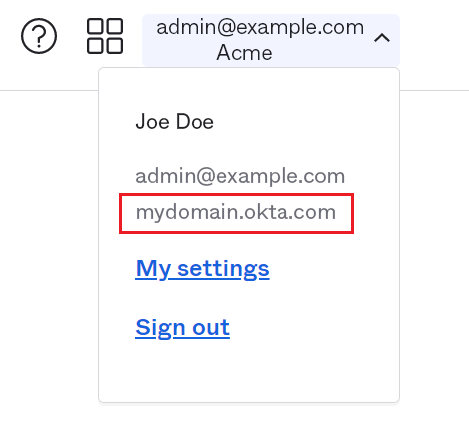
In the upper-right corner of the dashboard, click on the drop-down menu labeled with your email, and copy the Okta domain.
See also
Go to your GitOps repository, inside your
rok-toolsmanagement environment:root@rok-tools:/# cd ~/ops/deploymentsSpecify the client ID:
root@rok-tools:~/ops/deployments# export OIDC_CLIENT_ID=<CLIENT_ID>Replace
<CLIENT_ID>with the client ID you copied in step 5b.Specify the client secret:
root@rok-tools:~/ops/deployments# export OIDC_CLIENT_SECRET=<CLIENT_SECRET>Replace
<CLIENT_SECRET>with the client secret you copied in step 5c.Render the AuthService credentials:
root@rok-tools:~/ops/deployments# j2 \ > kubeflow/manifests/common/oidc-authservice/overlays/deploy/secret_params.env.j2 \ > -o kubeflow/manifests/common/oidc-authservice/overlays/deploy/secret_params.envSet the public URL of your EKF installation:
root@rok-tools:~/ops/deployments# export FQDN=<FQDN>Replace
<FQDN>with your installation’s public URL. For example:root@rok-tools:~/ops/deployments# export FQDN=arrikto-cluster.apps.example.comSet the public URL of your application:
root@rok-tools:~/ops/deployments# export OIDC_PROVIDER=https://<OKTA_DOMAIN>Replace
<OKTA_DOMAIN>with the Okta domain URL you copied in step 5d.Configure AuthService to convert user emails to usernames:
root@rok-tools:~/ops/deployments# export \ > USERID_TRANSFORMERS='[{"matches": "@<DOMAIN>", "replaces": "" }]'Replace
<DOMAIN>with the domain of your organization. For example:root@rok-tools:~/ops/deployments# export \ > USERID_TRANSFORMERS='[{"matches": "@example\\.com", "replaces": "" }]'Make sure to include
\\. With this example domain, AuthService will convert user IDs likeuser@example.comintouser.Note
USERID_TRANSFORMERSaccepts a JSON formatted list of UserID transformation rules with the following format:USERID_TRANSFORMERS=[{"matches": "regex", "replaces": "value" }]AuthService will transform the UserID by finding the first transformation rule that matches
regexand replacing it withvalue.Set the default Okta settings:
root@rok-tools:~/ops/deployments# export USERID_CLAIM=preferred_usernameroot@rok-tools:~/ops/deployments# export OIDC_SCOPES=profile,openid,offline_accessroot@rok-tools:~/ops/deployments# export AUTHSERVICE_URL_PREFIX=https://${FQDN?}/authservice/root@rok-tools:~/ops/deployments# export TEMPLATE_PATH=''Render the AuthService configuration:
root@rok-tools:~/ops/deployments# j2 \ > kubeflow/manifests/common/oidc-authservice/overlays/deploy/params.env.j2 \ > -o kubeflow/manifests/common/oidc-authservice/overlays/deploy/params.envSee also
Commit your changes:
root@rok-tools:~/ops/deployments# git commit \ > -am "Use the Okta OIDC provider for Kubeflow authentication"Apply the manifests:
root@rok-tools:~/ops/deployments# rok-deploy \ > --apply kubeflow/manifests/common/oidc-authservice/overlays/deployRestart the Pods manually:
root@rok-tools:~/ops/deployments# kubectl delete pods -n istio-system -l app=authservice
Verify
Ensure that the
authserviceStatefulSet is running. Verify that field STATUS is Running and field READY is 1/1:root@rok-tools:~/ops/deployments# kubectl get pods -n istio-system -l app=authservice NAME READY STATUS RESTARTS AGE authservice-0 1/1 Running 0 13sLog in with your Okta credentials at
<FQDN>, where<FQDN>is the public URL of your EKF installation. For example,https://arrikto-cluster.apps.example.com.